

Image from: myrenovatedlife.blogspot.com
I knew configuring our gallery wall in the living room wasn’t going to be easy, but I didn’t realize what an insanely huge pain it would be. My Pinterest was filled with grand, eccentric gallery walls (like the ones above and below) and I was excited to get started.
I knew ours couldn’t be as grand, given our space constraints (really the only place that worked was the small space above the piano). Nor could it be as eccentric (my husband doesn’t really do eccentric), but I was determined to make it work.

Image from: laurelberninteriors.com
Thankfully, designer Anna who came to the house in October (remember the zebra rug dilemma?), had already figured out and given me dimensions. I taped out the 85″ x 40″ space on our dining room floor and began unwrapping artwork (that was still packed up from our San Francisco move last Spring).
We actually have a decent amount of art (much of it was collected by our parents – pieces they picked up from their travels to Japan, China, Germany) and all of it was acquired before my husband and I started dating (hmm, I don’t like that. We’ll need to remedy that soon). It was a challenge trying to decide which pieces went well together without looking too uniform. But it was a fun challenge and I enjoyed figuring it all out.
 So now what? How were we going to transfer them to the wall? (I have to add that the art stayed on the floor like this for about a month! My husband and I both sort of ignored it, not wanting to deal with the next step.)
I’d seen articles touting the ease of cutting out pieces of paper the same dimensions of the art, taping them to the wall, driving a nail in each and voila. Simple, right?

Image from laurelberninteriors.com
Wrong. Cutting the paper to the exact (and we are exact around here) dimensions proved too difficult (I didn’t have thick packaging paper so I tried wrapping paper). The paper kept crinkling and it was hard to trace around the frames. And even if I did get to the point where I traced and cut them perfectly to size, I’d have to arrange them all over again on the wall, which was going to be a headache.
My husband suggested cutting a piece of cardboard (to the display dimensions), arranging the pieces again and tracing around them. This was the hardest part for me. I took pictures of the layout so I could recreate the display, but when I tried to arrange the art on the cardboard, it just wasn’t right. It took SO much tweaking before I was satisfied (I’m talking eighths of inches, but when you’re dealing with something you’re going to see every day, it has to be perfect).
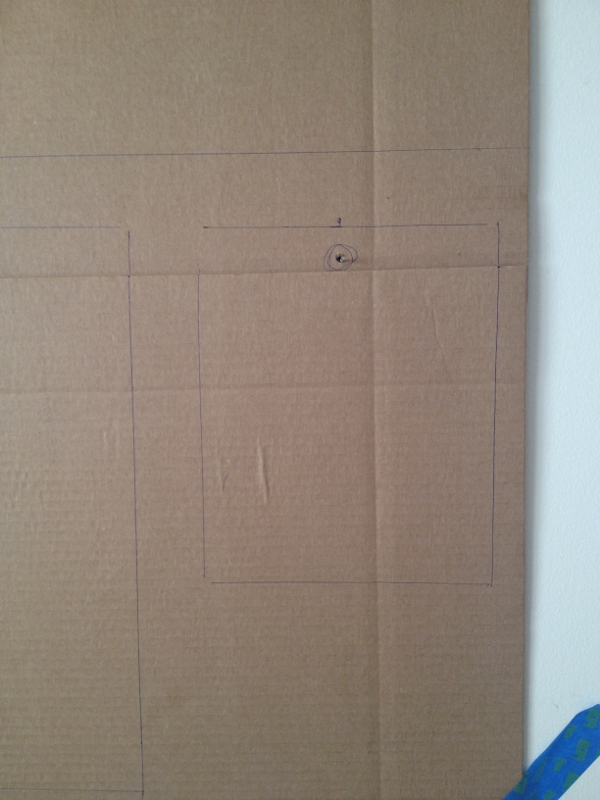 He ended up tracing the art (using a level, to make sure everything was straight) and figuring out where the nail holes should be. Thank goodness he took over at this point, because for sure I would have screwed something up.
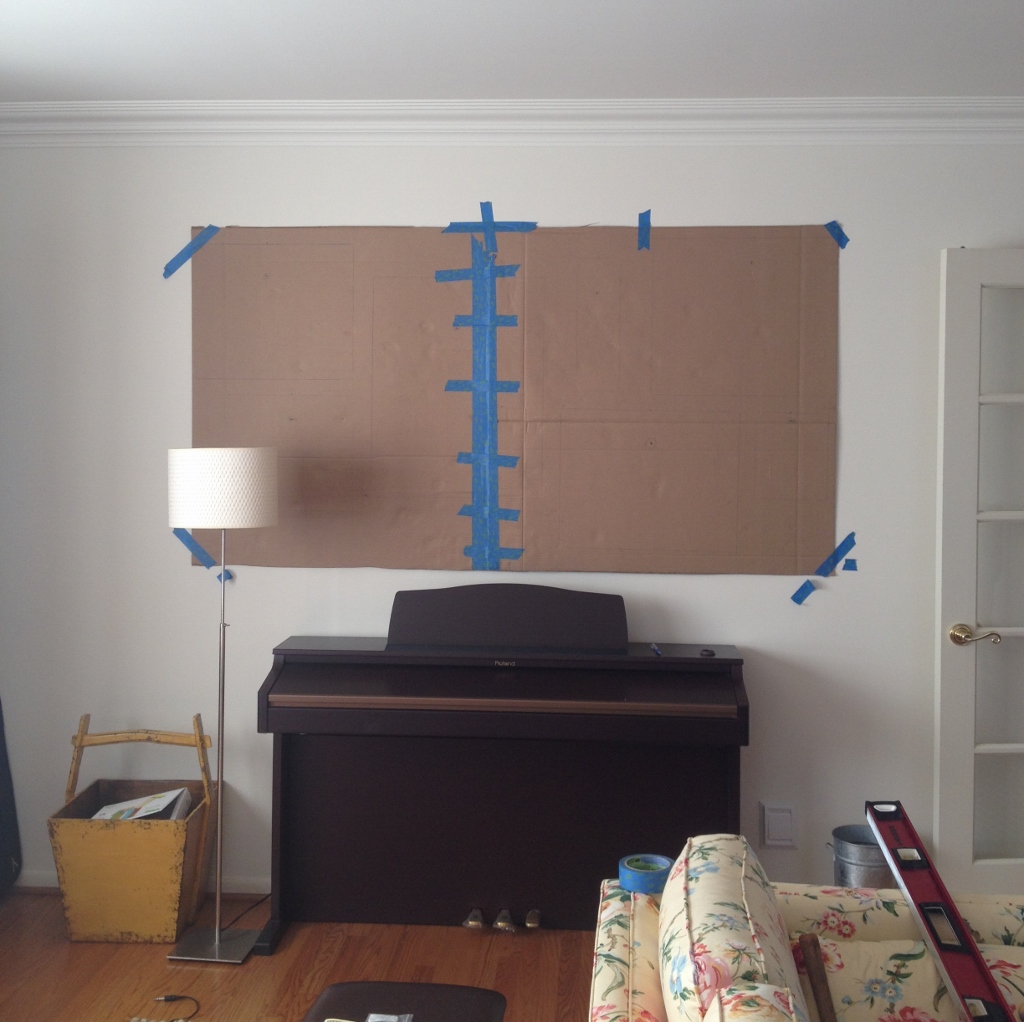 Then he centered the cardboard over the piano, taped it up and re-marked the nail holes on the wall (through the cardboard). He also put all the artwork up on the wall and leveled each piece.
 Hurray! I really happy with how it turned out. I regret not having the painters re-paint the walls a deep gray-blue (Brewster Gray, I love you!) while they were here doing the kitchen/family room. It would have added a dimension and feel to the room, adding mystery, while also making it more inviting. But it’s still a possibility down the line and the gallery wall definitely helps pull the room together and makes it feel more lived-in.

Oooh gray would have looked amazing! I had mine gray but painted it out black – even more drama. But in the meanwhile, the gallery wall is perfect!
LikeLiked by 1 person
It looks wonderful! I like how you showed the process in this post. I would have just made so many mistakes throwing the pictures up there.
LikeLiked by 1 person
Oh I would have, too. My husband got annoyed at my incompetence and just took over. (which was maybe my plan all along?) hehe.
LikeLiked by 1 person
Hahaha. Nice.
LikeLike
Love it! Also thrilled that a piece of mine (Jon’s too) made the gallery wall. It lives on for another generation. Great job.
LikeLiked by 1 person
Thanks!
LikeLike
Love it! It came out so good! I agree, totally pulls the room together. Helps that you have some really good and unique pieces too ;)
LikeLiked by 1 person
Thanks so much for helping with the dimensions! I would have wasted hours on trying to figure it out the best block of space and then I still would have gotten it wrong.
LikeLike
Wow, looks great!
LikeLiked by 1 person
Thank you, sir!
LikeLike