Kitchen Remodel – The Slanted Island

IMG_9905 (768x1024)The first time I put an egg on the island, it rolled off. Splat. I thought “huh” and that was that. After this started happening frequently, I started to wonder if something wrong with the island. And then my favorite rollingĀ  pin fell off and broke.

Not sure if I didn’t trust my instincts or if I just didn’t want to deal with a potentially major repair issue, but I didn’t do anything about it until a month later, when I was sitting on the couch, looking back at the kitchen and thought the island looked like it was tilting slightly to the right. My husband got out a level to confirm it was slanted (off by a little less than a quarter inch) before we called Tim, our Project Manager on the remodel (and Tim, if you think you’ve gotten out of an interview, think again!).

It was a relatively easy fix (well, I don’t know how easy it actually was, but it didn’t take Tim and Marty, the carpenter, long to fix it). They were able to raise the island and put a shim in it, which was covered up by the toe-kick. It’s all good now; no more runaway eggs.

Kitchen Remodel – Before and After

IMG_9254 (882x1024)We’re in!! The painters were done with the bulk of their work last Friday night and we were given the green light to move in. My husband and I stayed up til the wee hours, assembling our kitchen table and chairs, dusting and doing little things like putting felt on the bottoms of furniture legs. And then we poured ourselves a glass of Cabernet and took it all in.

There are a few outstanding issues (paint drips, a wonky faucet, motion sensor lights not working, waiting on new sofa and leather side chairs delivery, etc.), but otherwise we are D.O.N.E.

Let’s take a look at some before and after shots….

WallIMG_9255 (1024x768)The marble tile around the fireplace was taken down. The old fireplace was covered up and a new gas fireplace was installed, with built-ins flanking the sides (the closed cabinet on the left hides the flue).

house.kitchen3 (1024x681)IMG_9239 (882x1024)

house.family2IMG_9256 (1024x972)The wall between theĀ  family room and kitchen was taken out and the light fixtures were replaced. New hardwood flooring was put down throughout both rooms and stained. New drywall, baseboards and molding. Sliding doors were sanded and painted.

MicrowaveIMG_9258 (768x1024)All appliances were replaced. We kept the location of the fridge (but changed it to a french door style for easier use), but moved the range and oven location. We installed a small microwave on the back cabinet area to keep it out of the way. We removed the swinging door that separated the kitchen from the dining room.

house.kitchen (1024x681)IMG_9252 (1024x976)Peninsula with induction range was removed and an island was put in lengthwise. New everything. Cabinets, appliances, backsplash, molding, baseboard, lighting and paint. Kitchen window was moved eight inches to the right in order to maximize the corner space. Shoe molding was stained to match the floors and installed around the perimeter of the room and the island.

I’ll post more photos once all our furniture comes in and some art goes on the walls. Thanks for following our remodel! Although, now what am I going to write about!? (I’ll find something, don’t you worry).

Kitchen Remodel – Week Five: Appliances, Cabinet Installation, Carpentry, Lights, Butcher Block

IMG_9051 (1280x1280)We’re more than halfway to the finish line! Week five of the remodel was really exciting, as all the work done was visible, so we were able to notice daily changes.

IMG_8973 (930x1280)
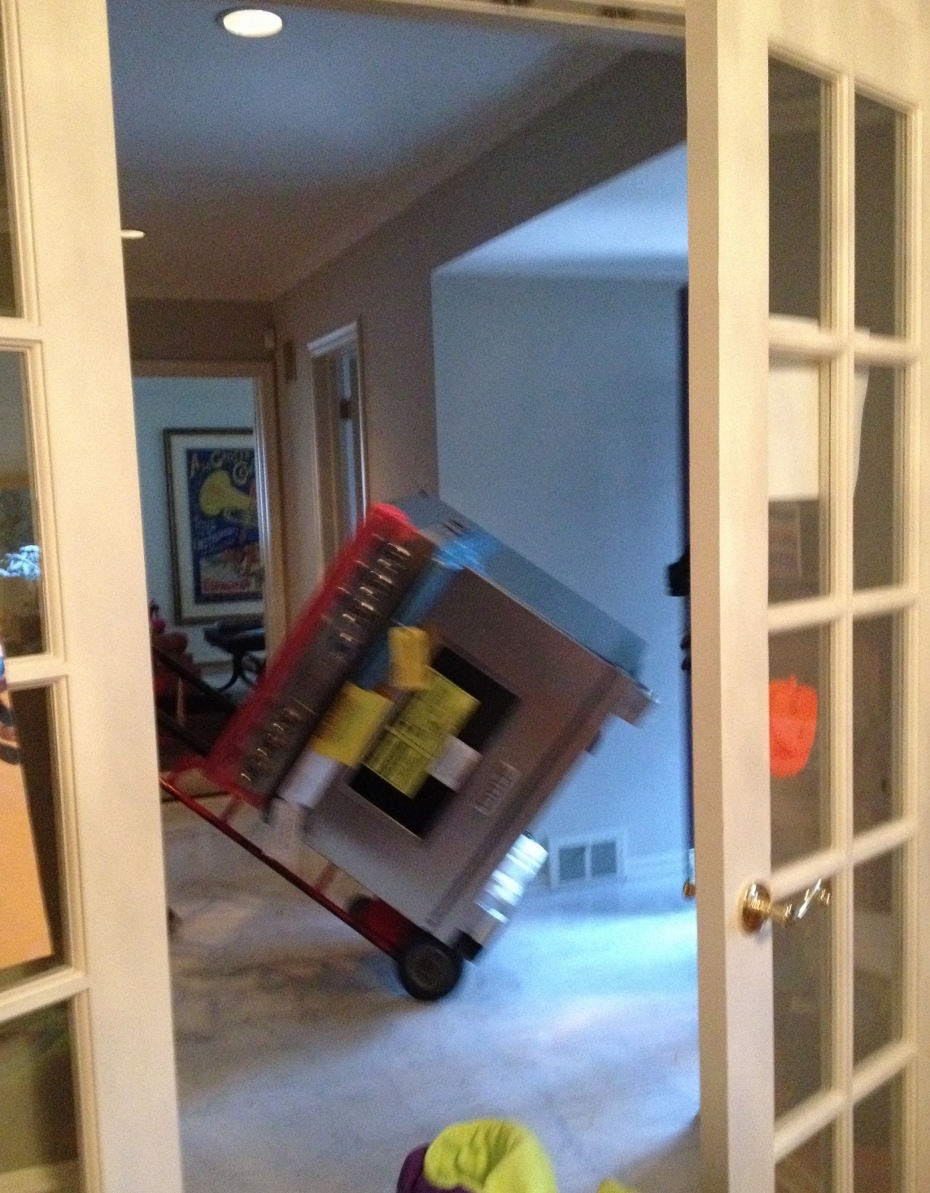
The appliances arrived Monday afternoon (my only shot of the actual delivery is blurry).

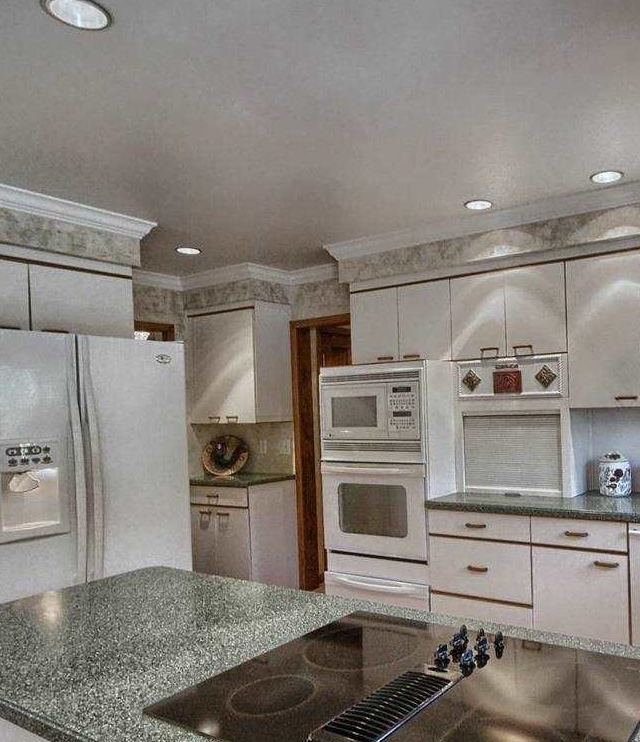
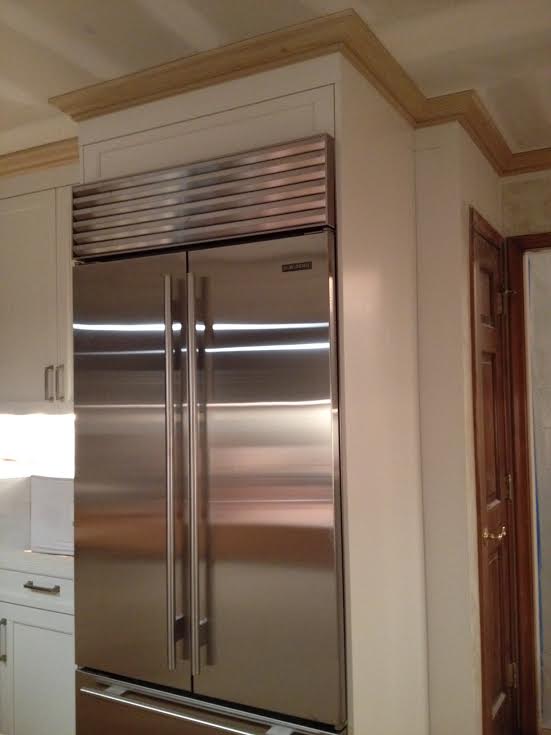
We settled on stainless steel appliances. It was a pretty easy decision. What wasn’t easy was deciding which brands and/or models to buy. We went back and forth over whether or not a high-end fridge and range were worth the investment and ultimately did spend the extra money (gulp). Wolf, please don’t let me down!

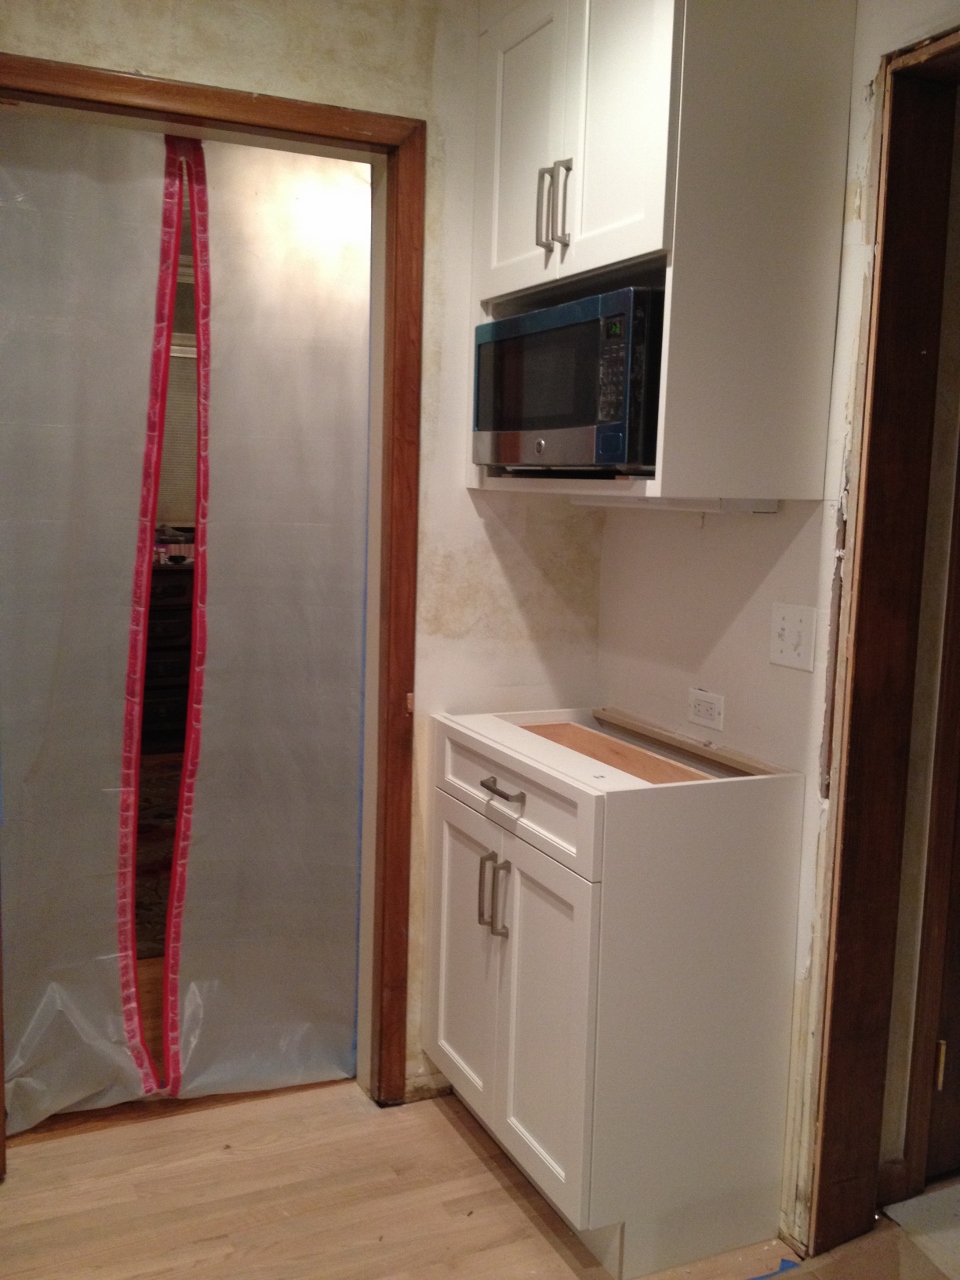
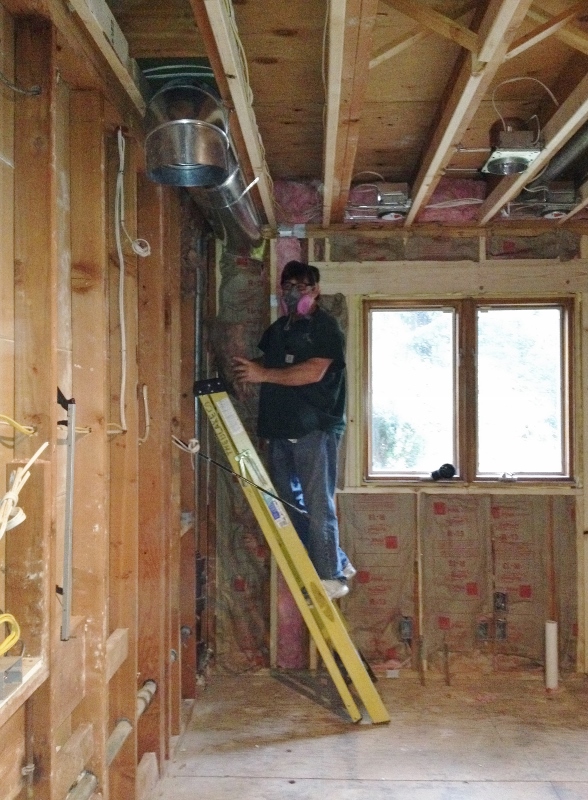
We also got our zippered door on Monday…

IMG_8974 (960x1280)

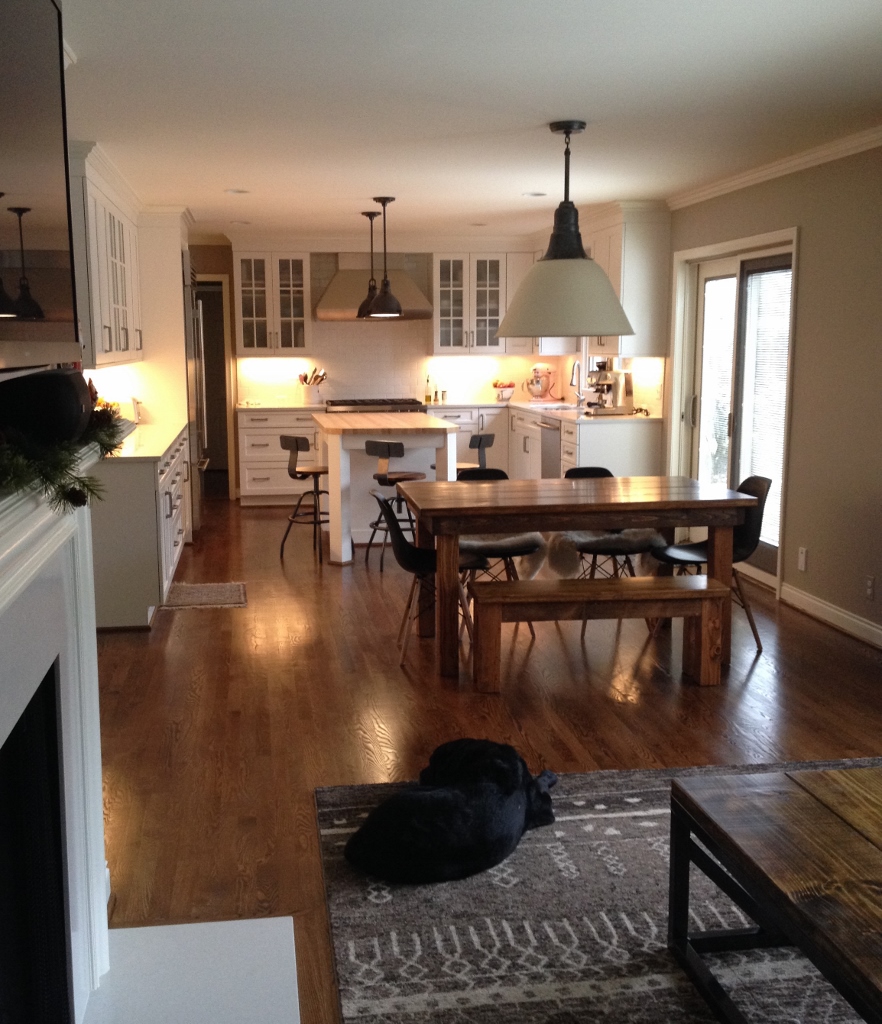
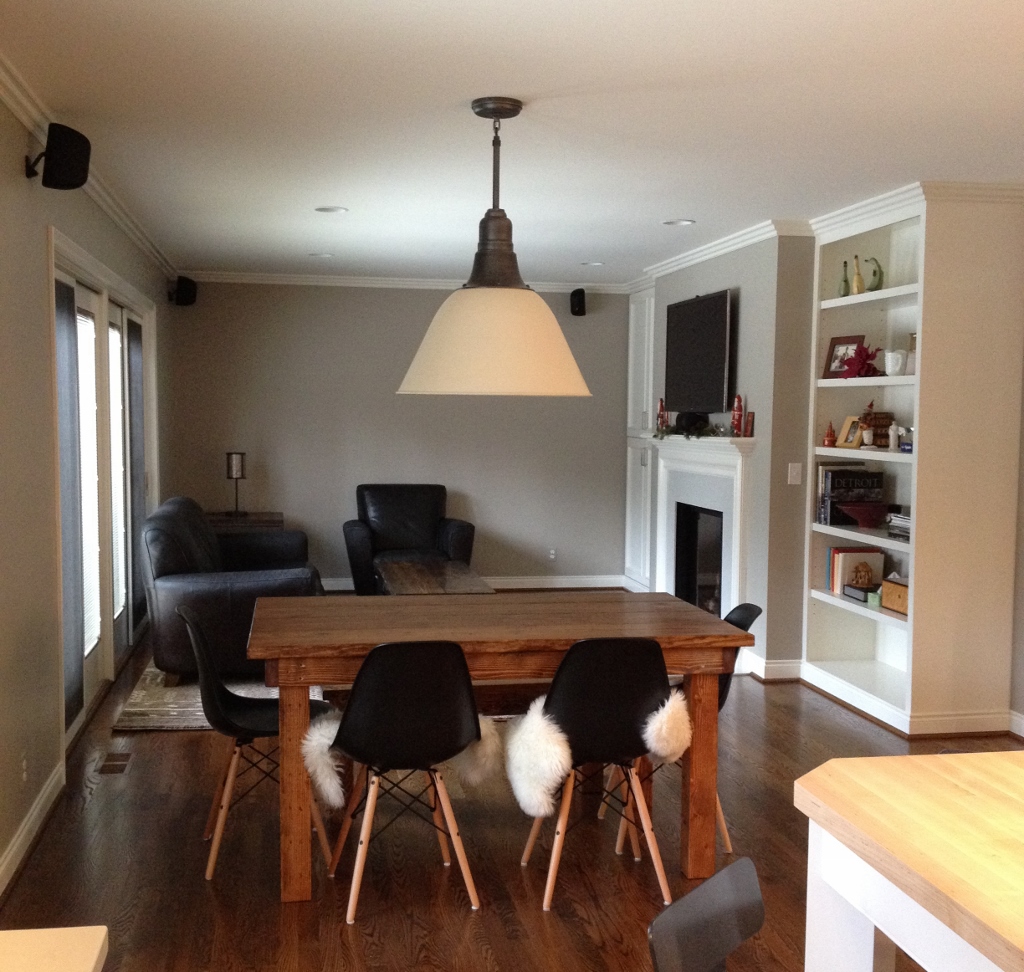
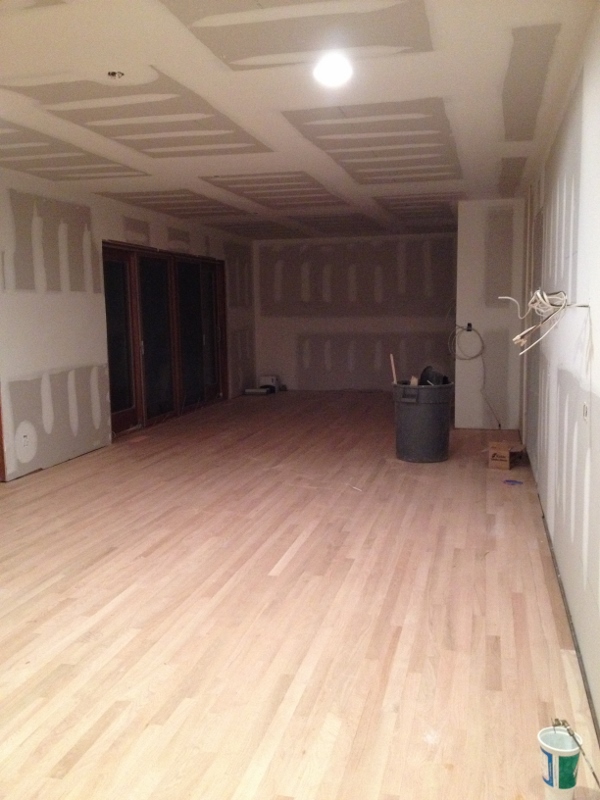
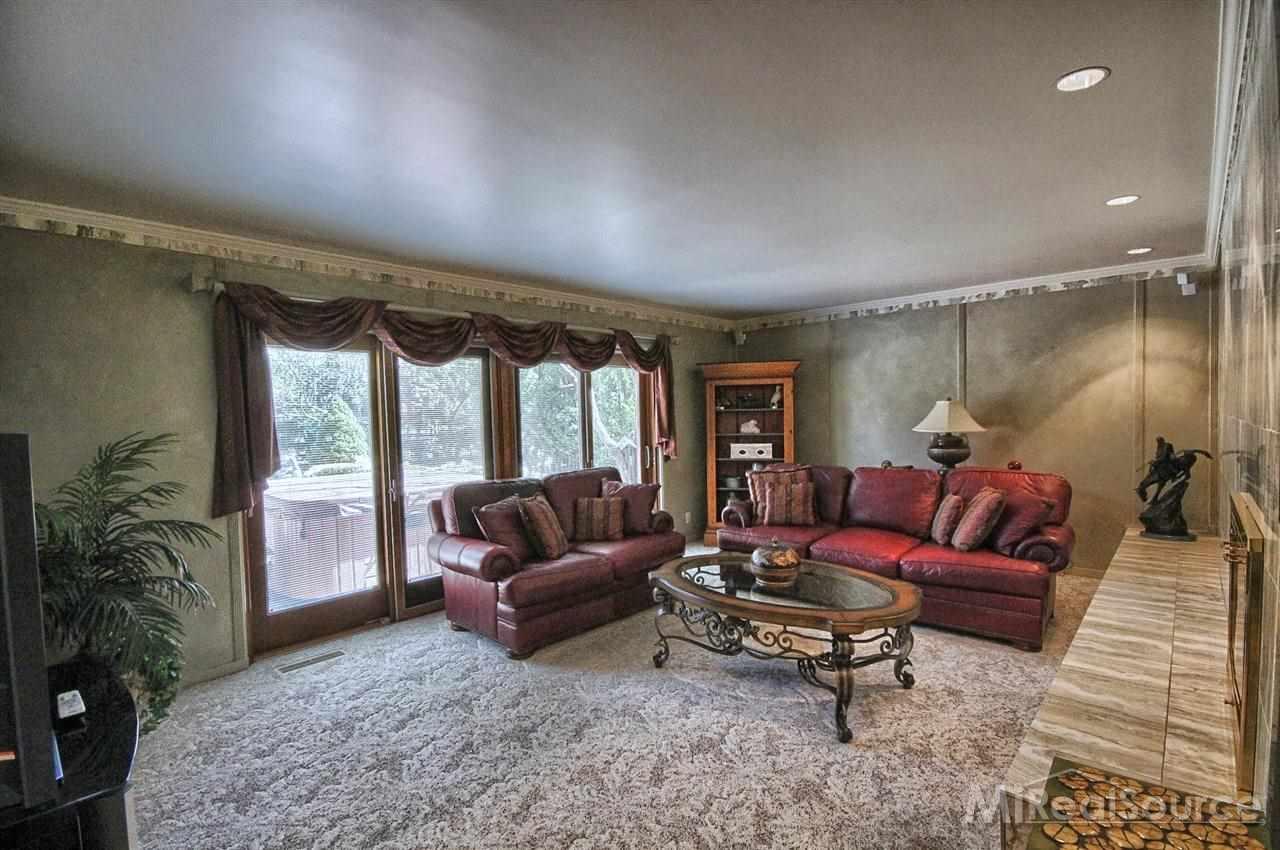
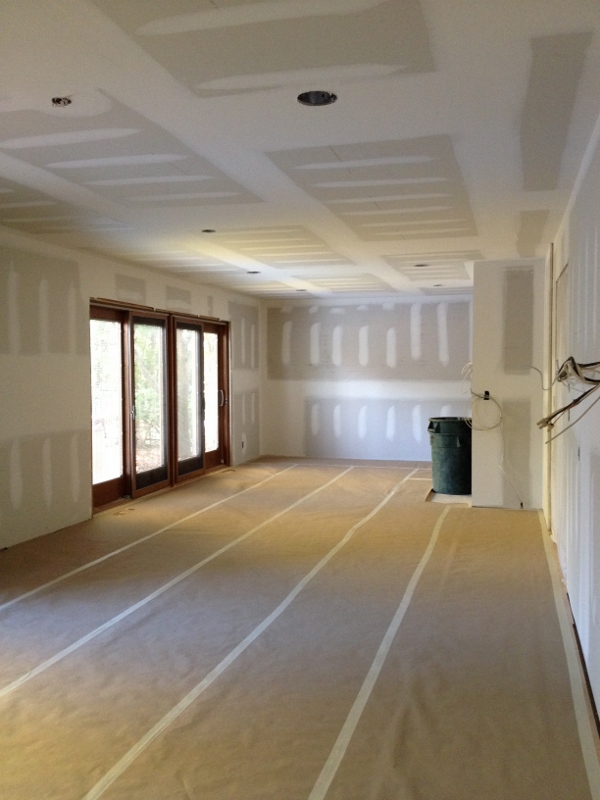
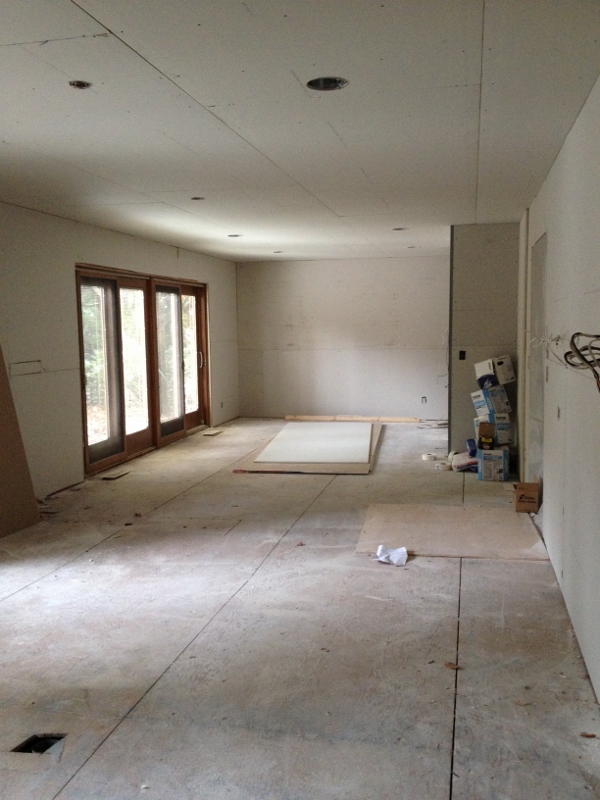
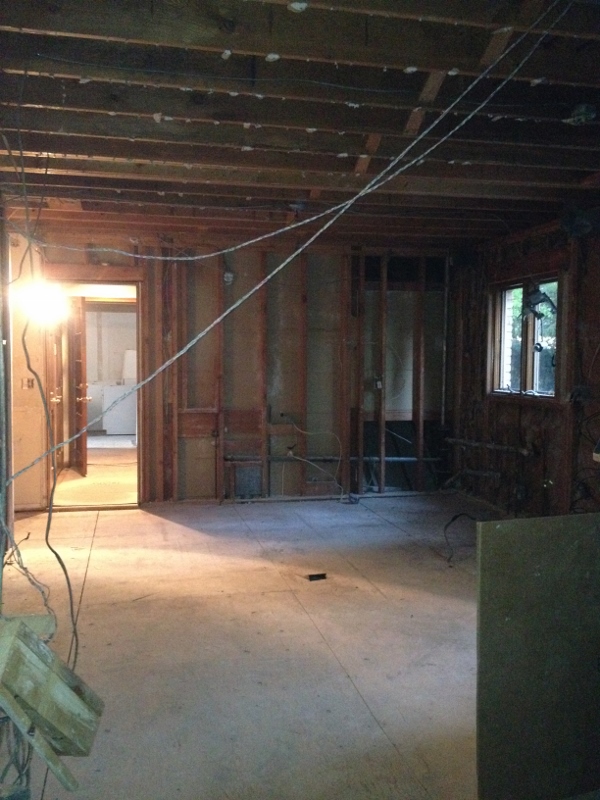
In the dining room, looking toward the kitchen.

IMG_9045 (960x1280)

Looking into the dining room. The basement is through the hallway to the right.

It was perhaps the most anticipated event of the week. Having a zipper means no more traipsing through the freezing cold (literally freezing – it was in the teens a couple days last week) and snow (!) to do laundry or grab something in the basement or take the dog out. Now we just zip, step through and we’re in the other half of the house (with access to both the basement and backyard via the sliding doors).

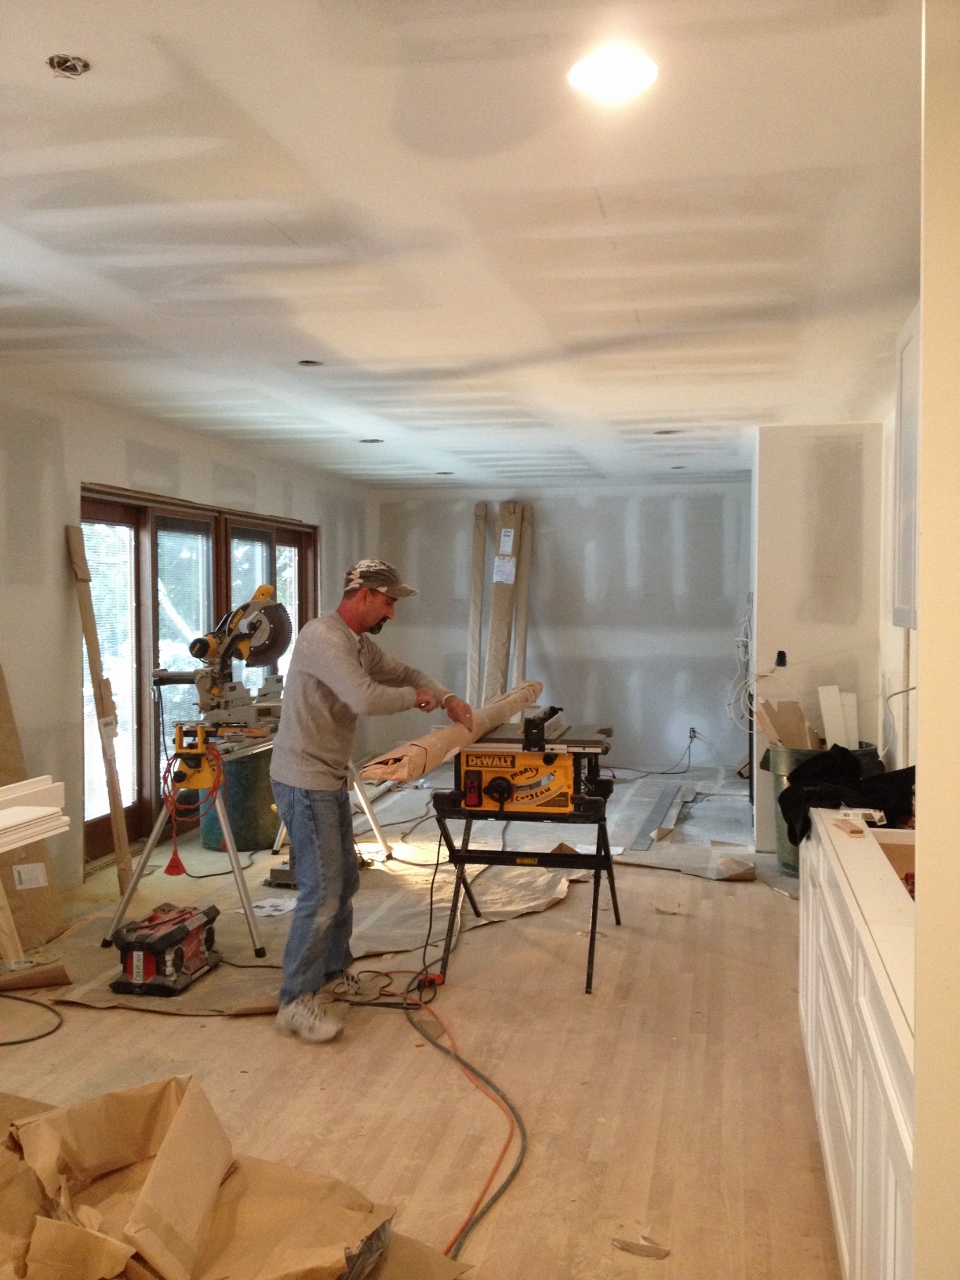
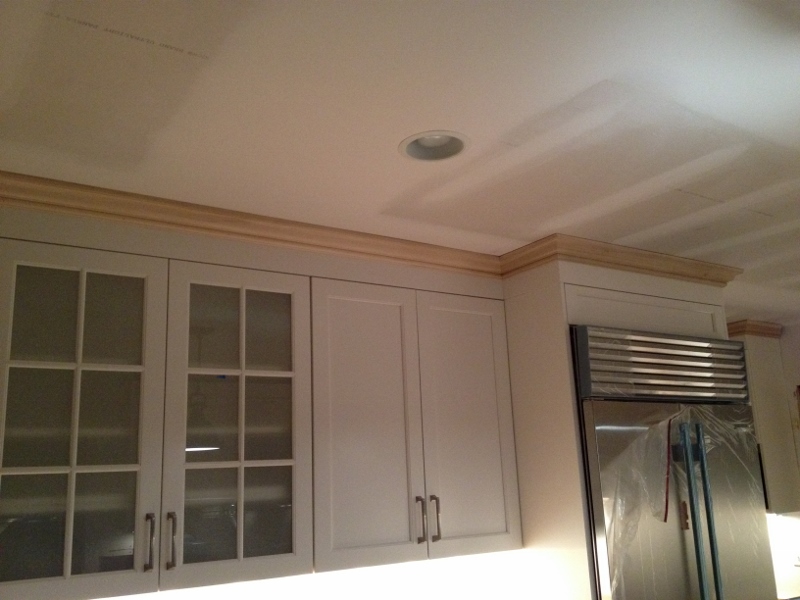
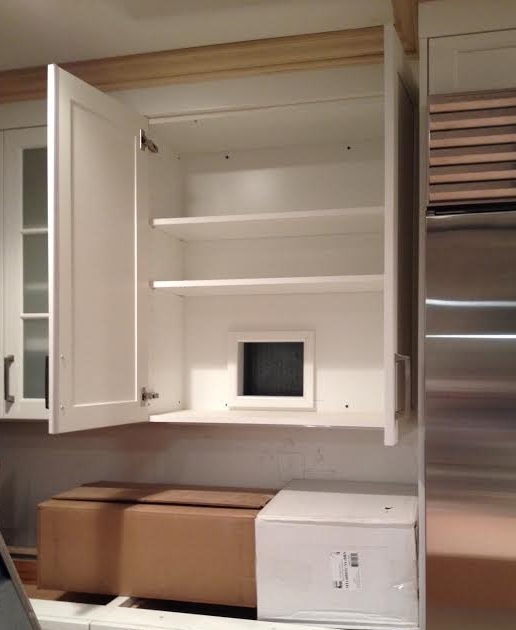
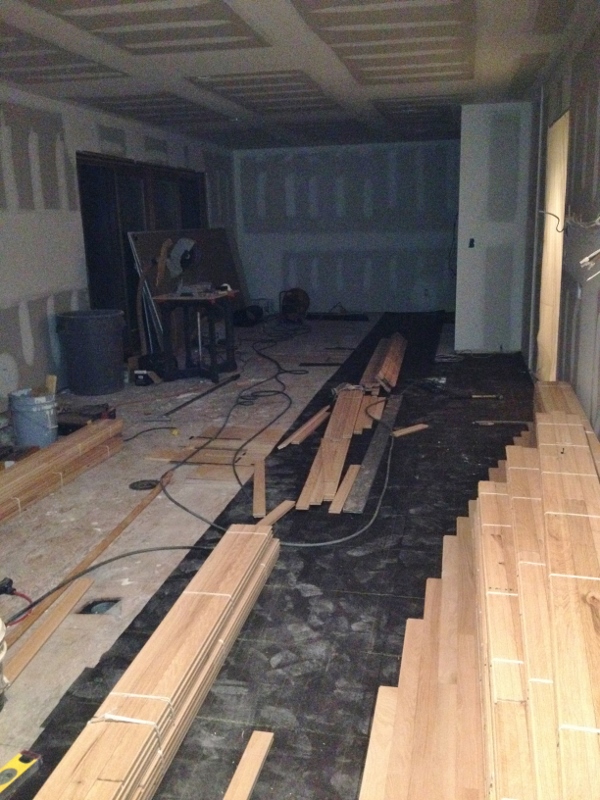
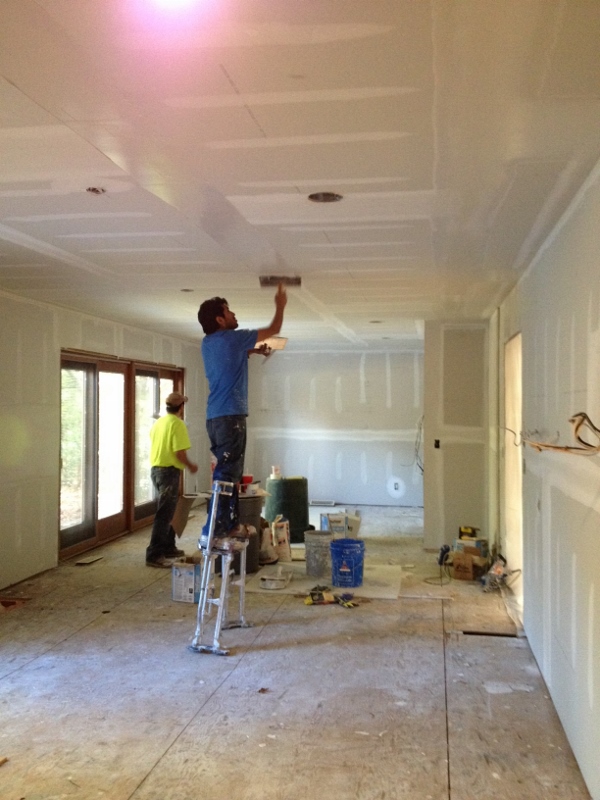
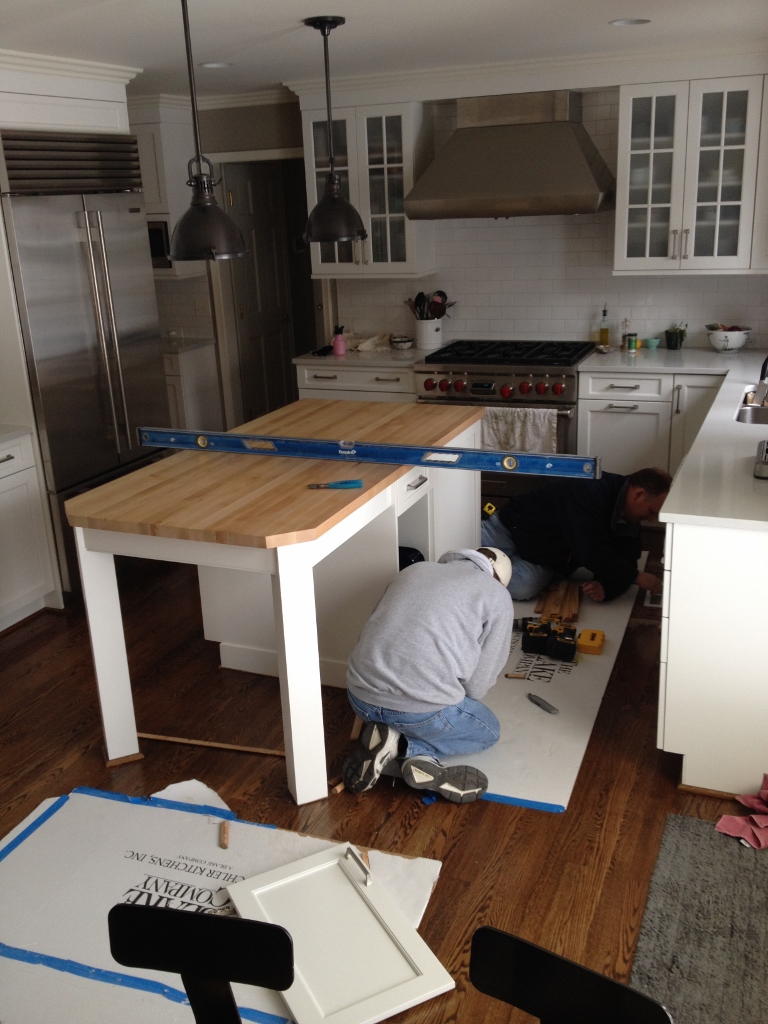
Marty was in all week (including over the weekend), working on various carpentry jobs.

IMG_8971 (960x1280)He built the cabinetry surrounding the fridge and put up some of the crown molding…

IMG_9041 (800x600)
Fridge (551x735)
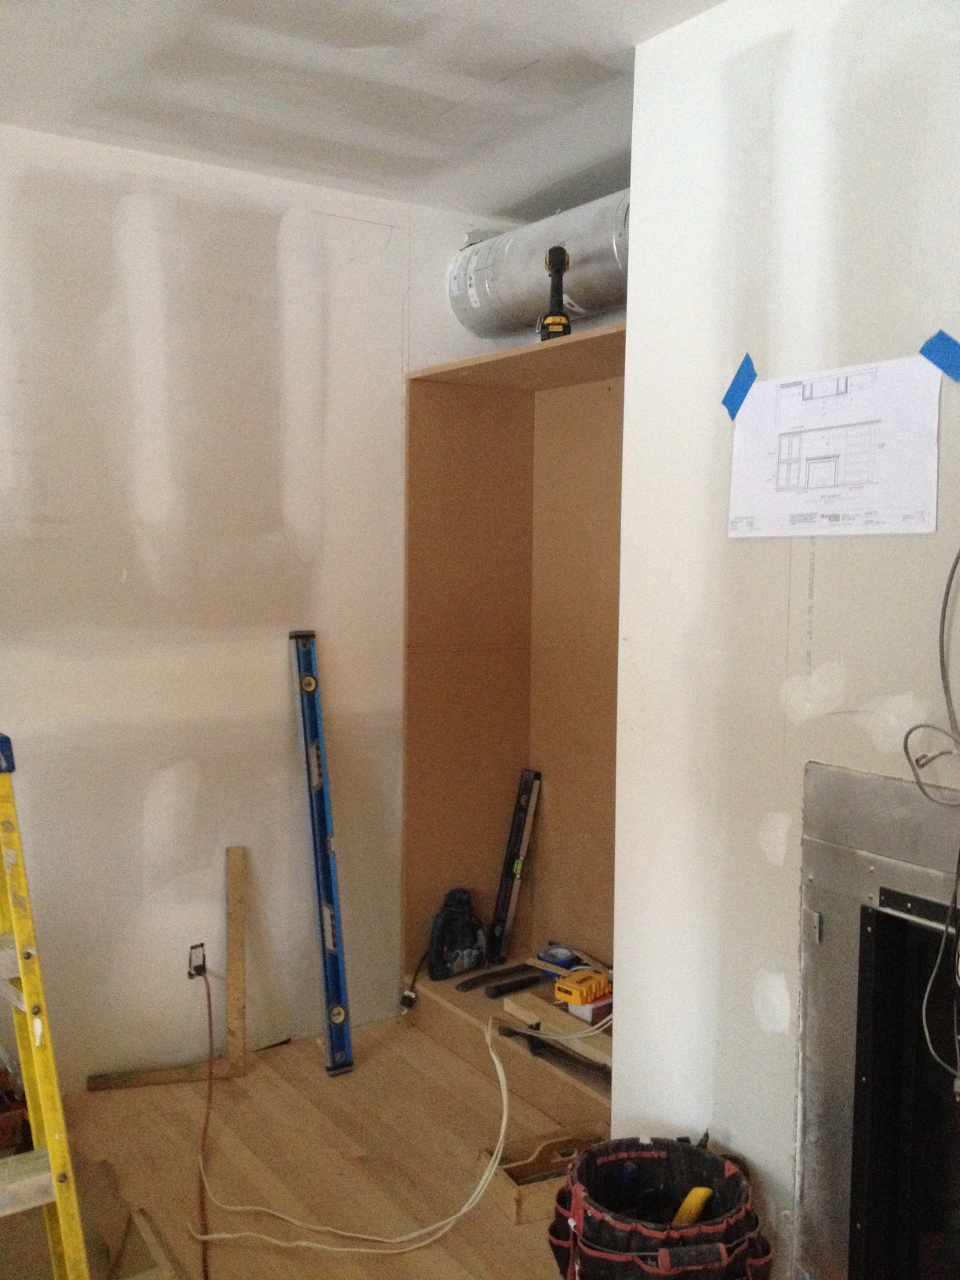
…cut a new hole for the laundry chute and built a frame around the opening…

laundrychute (516x630)
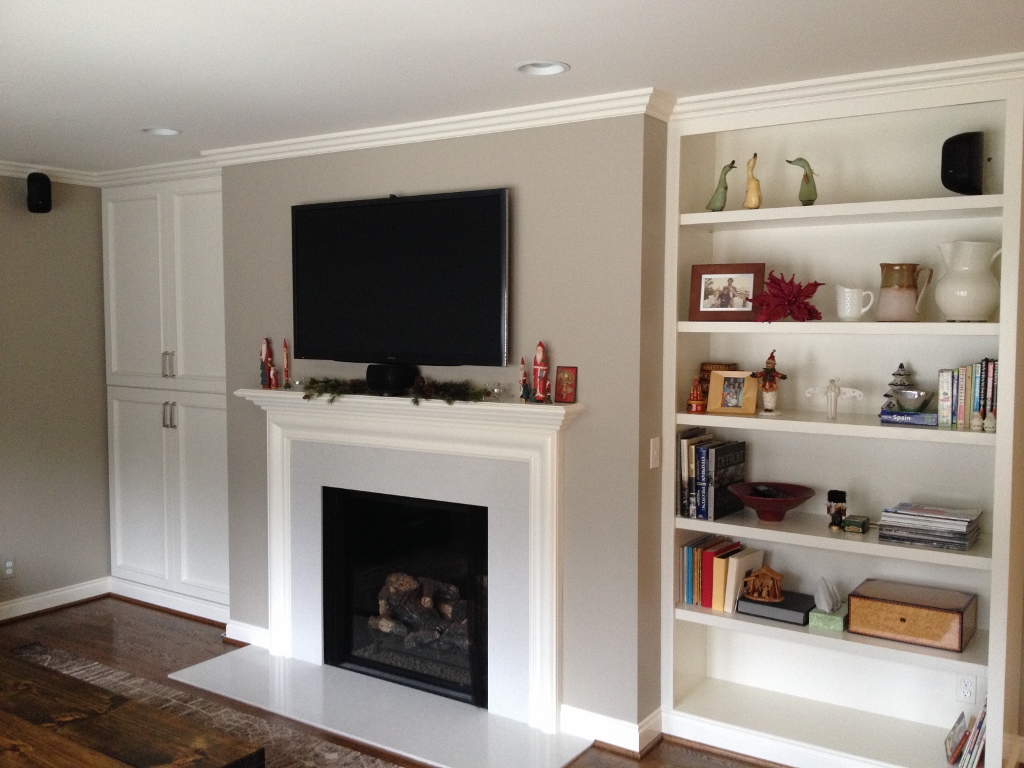
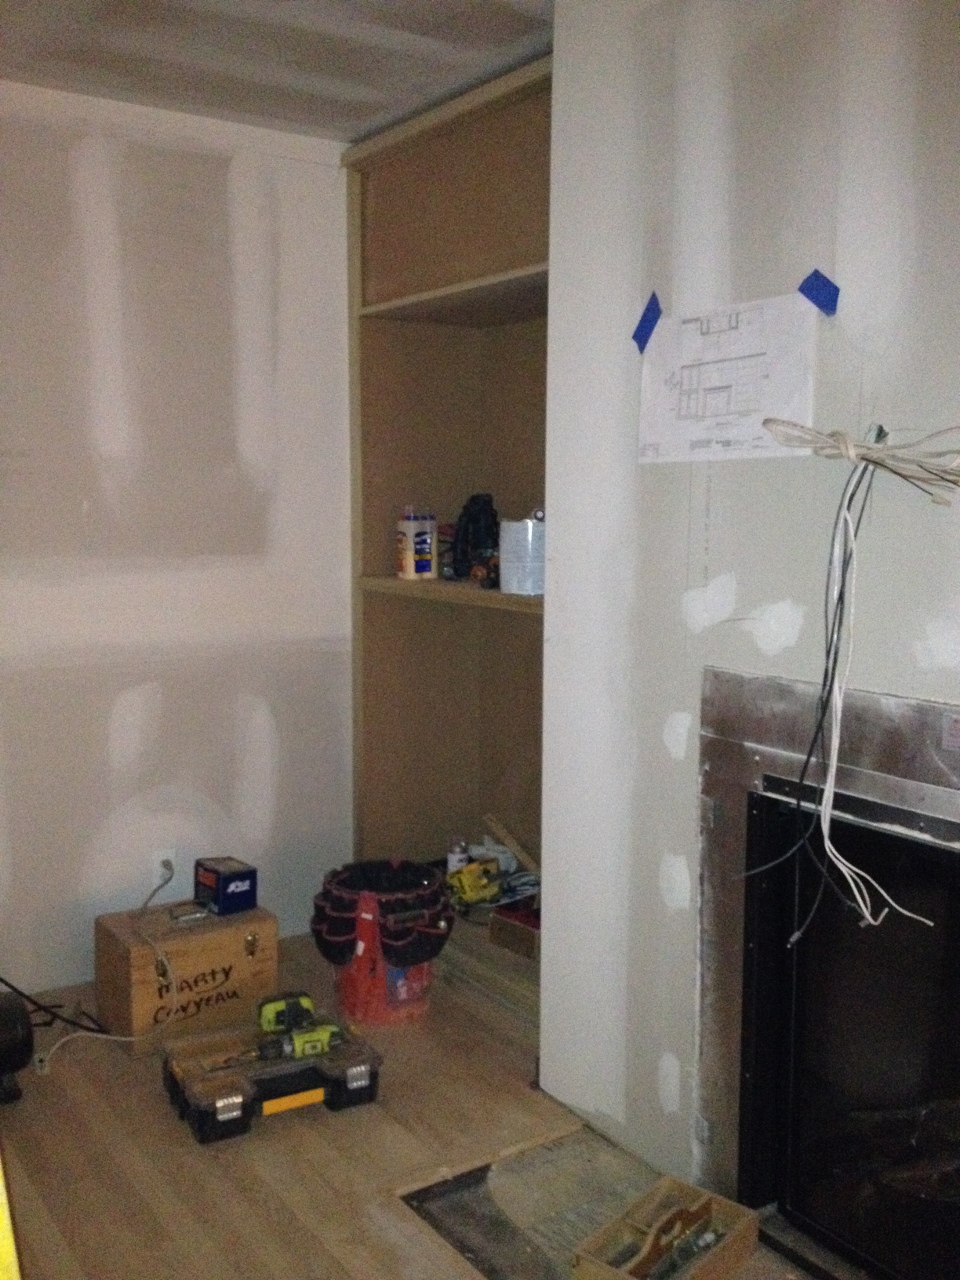
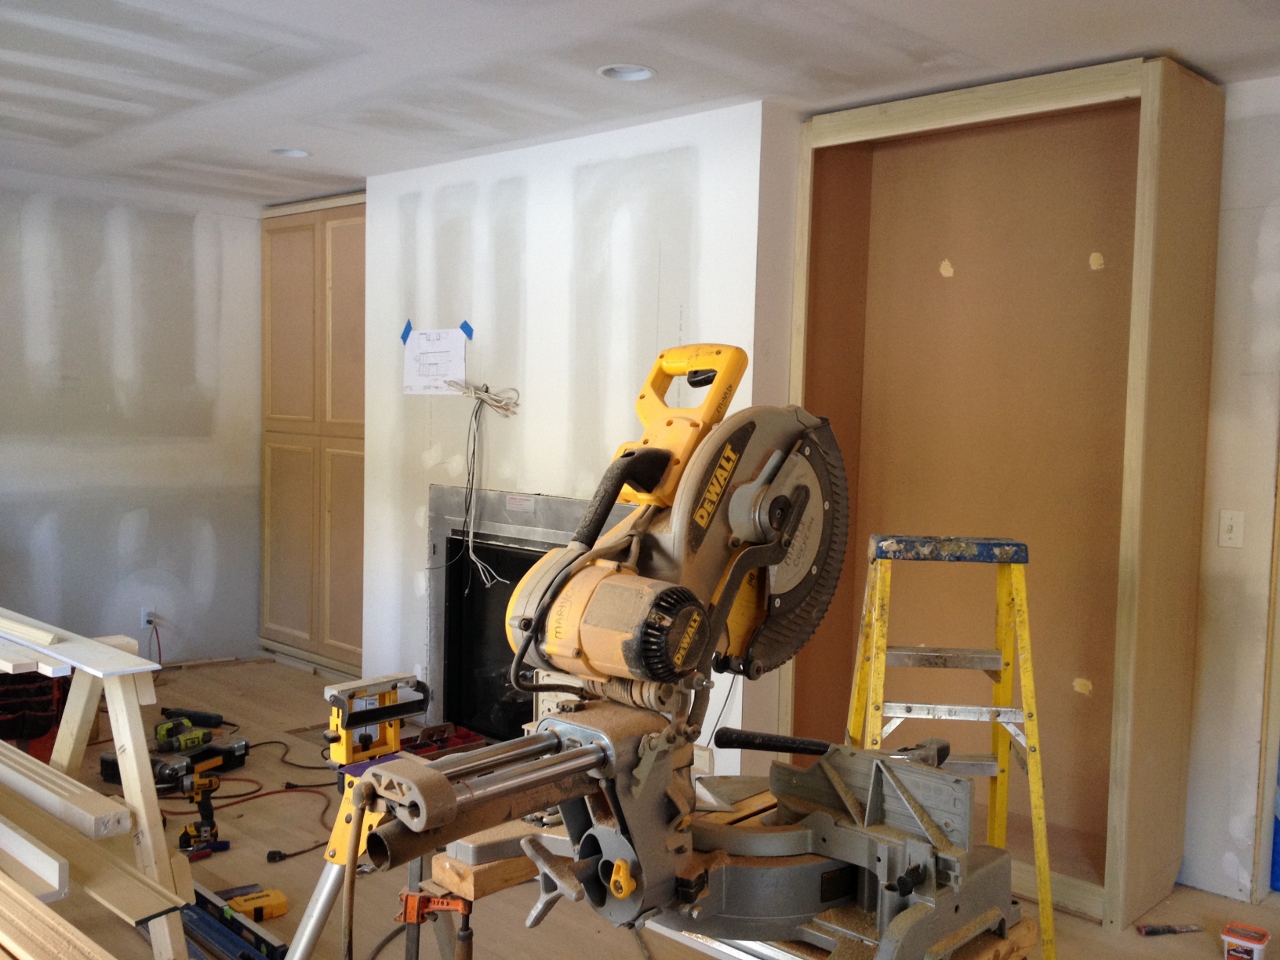
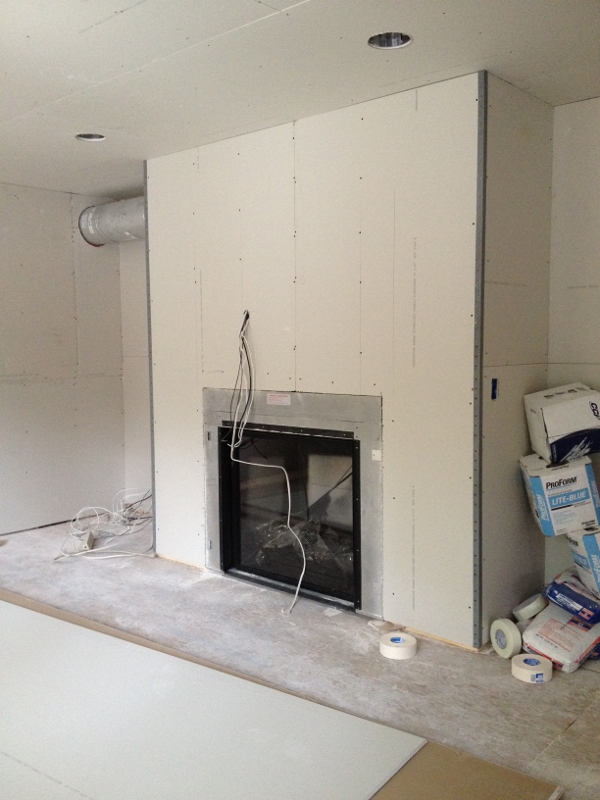
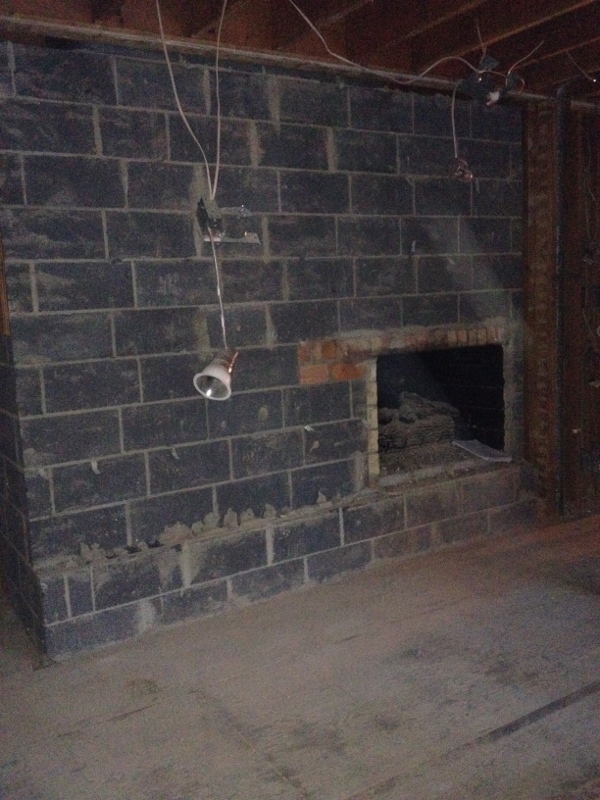
…and built the cabinets on either side of the fireplace.

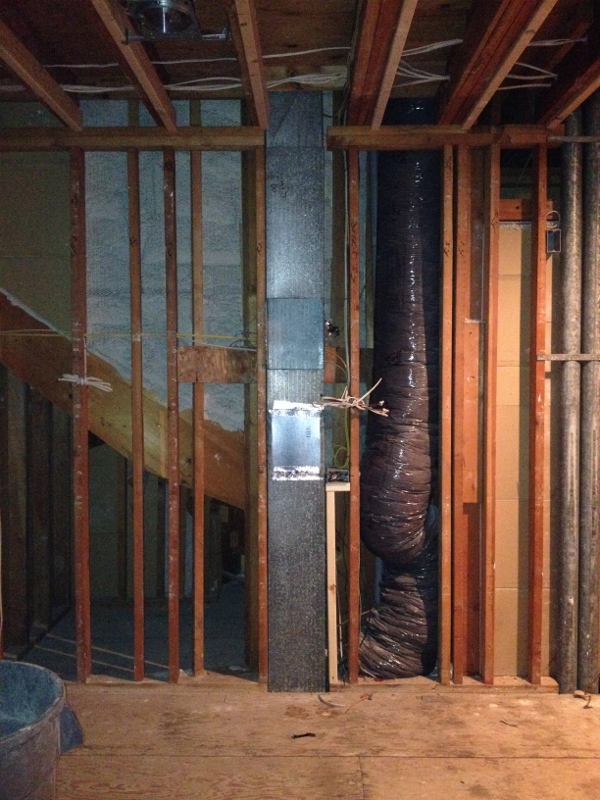
Initially, on the left of the fireplace, we were going to have a false door on the top half of the cabinet, but the flue ended up being higher than originally speculated. Thus, he was able to box in the flue, leaving us with almost two feet of storage space we otherwise would not have had.

IMG_9006 (960x1280)IMG_9040 (960x1280)IMG_9049 (1280x960) In order to center the fireplace, which was a priority for my husband (the family room was “his” room to design vs. the kitchen, which was “mine”), we not only had to sacrifice a few inches of space lengthwise, but we were also left with another symmetry issue, caused by the flue having to vent out through the side (there’s another fireplace directly opposite this one, in the living room).

There were a few different choices including having two closed cabinets or no cabinet on the right of the fireplace. We thought about it a lot and chose the option that we felt was the best aesthetically.

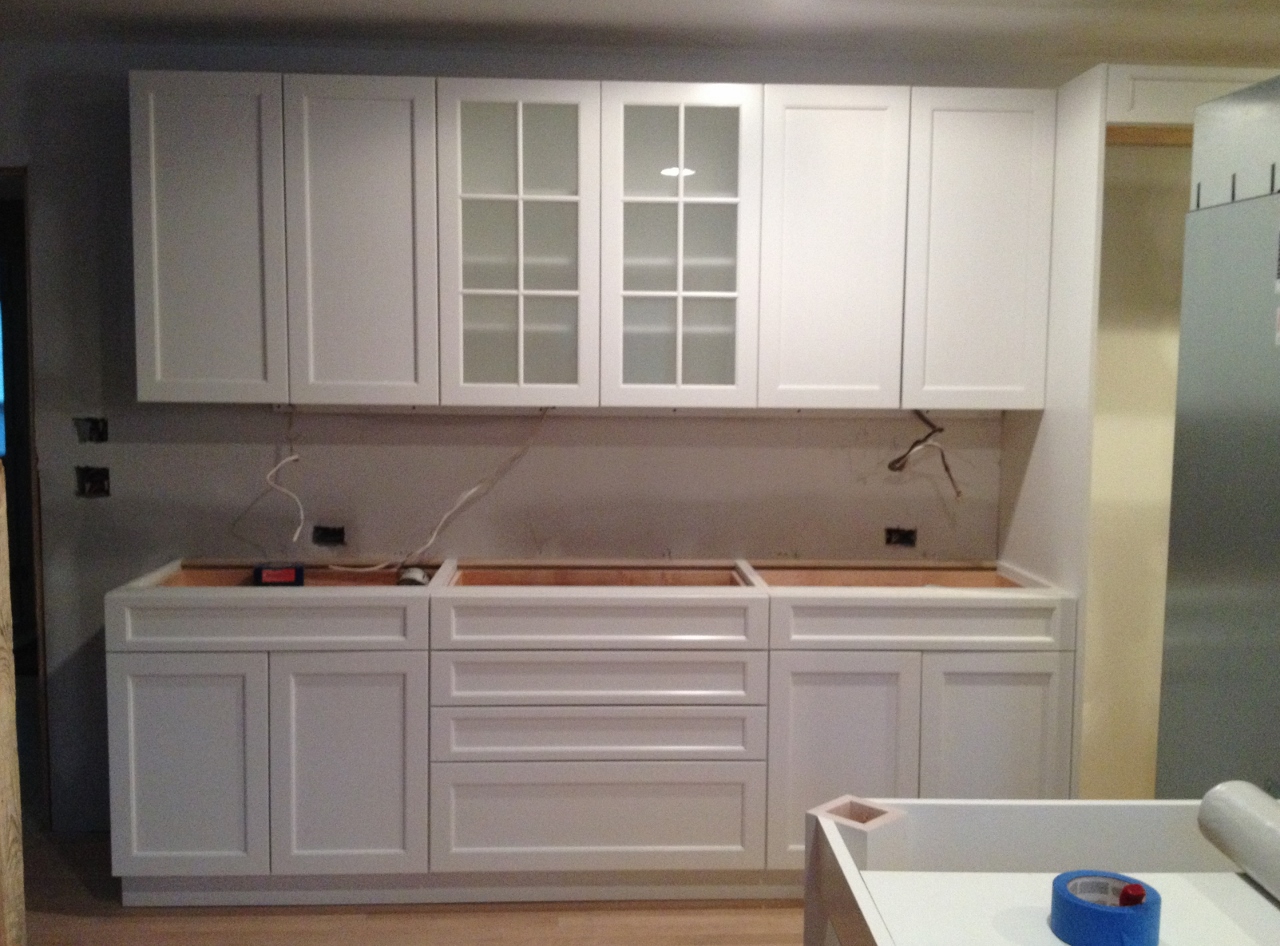
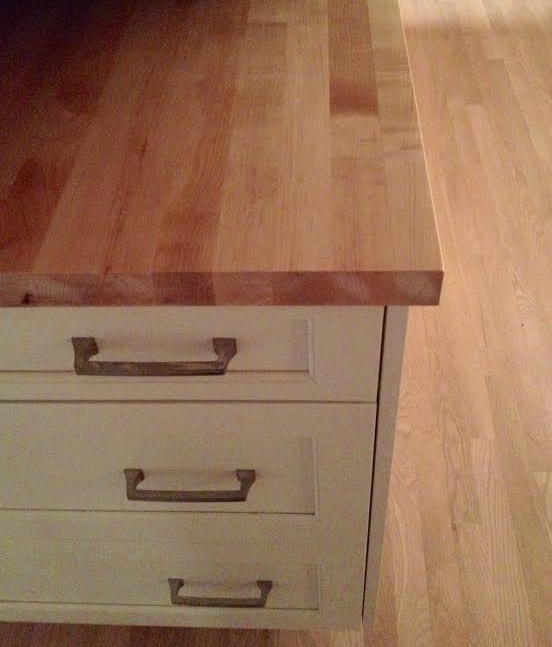
Hardware was installed on the cabinets (I went with one of three (?) choices of standard hardware rather than pay additional dollars for a different kind of pull).

IMG_8977 (1280x946) IMG_8992 (1280x958)
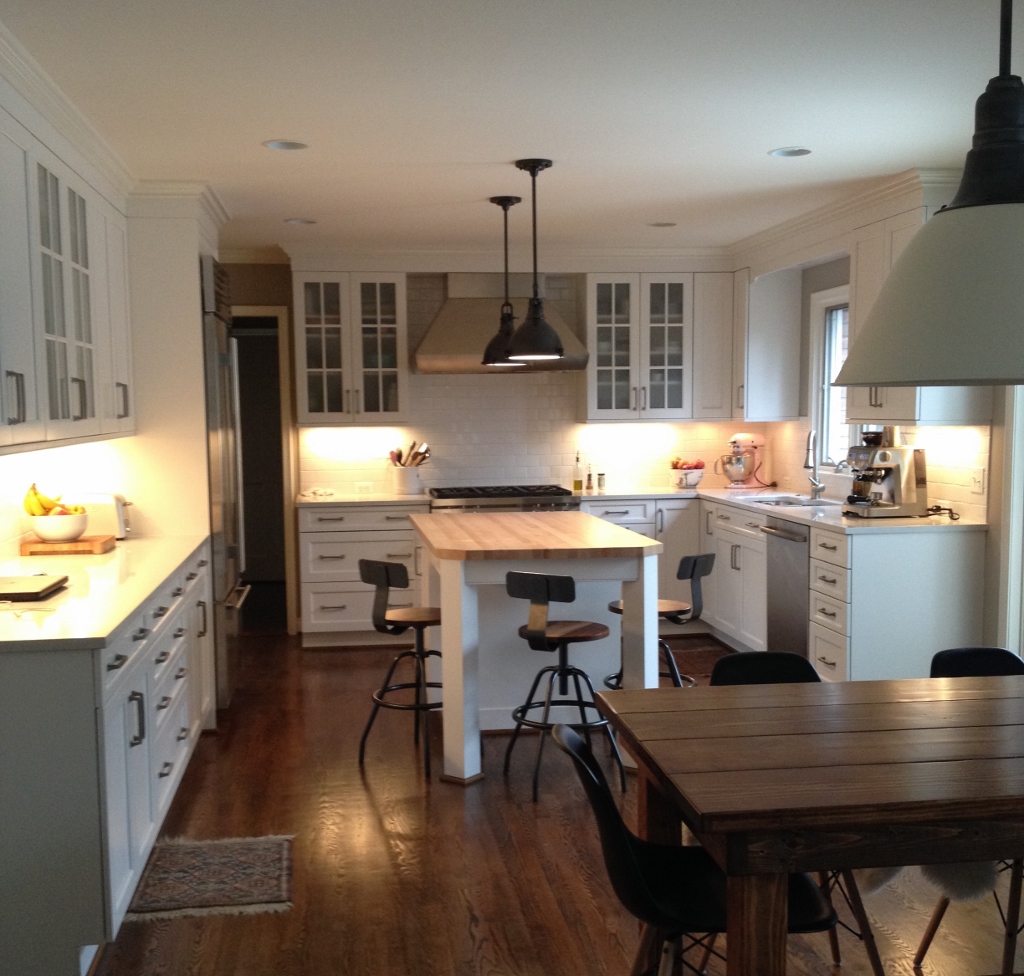
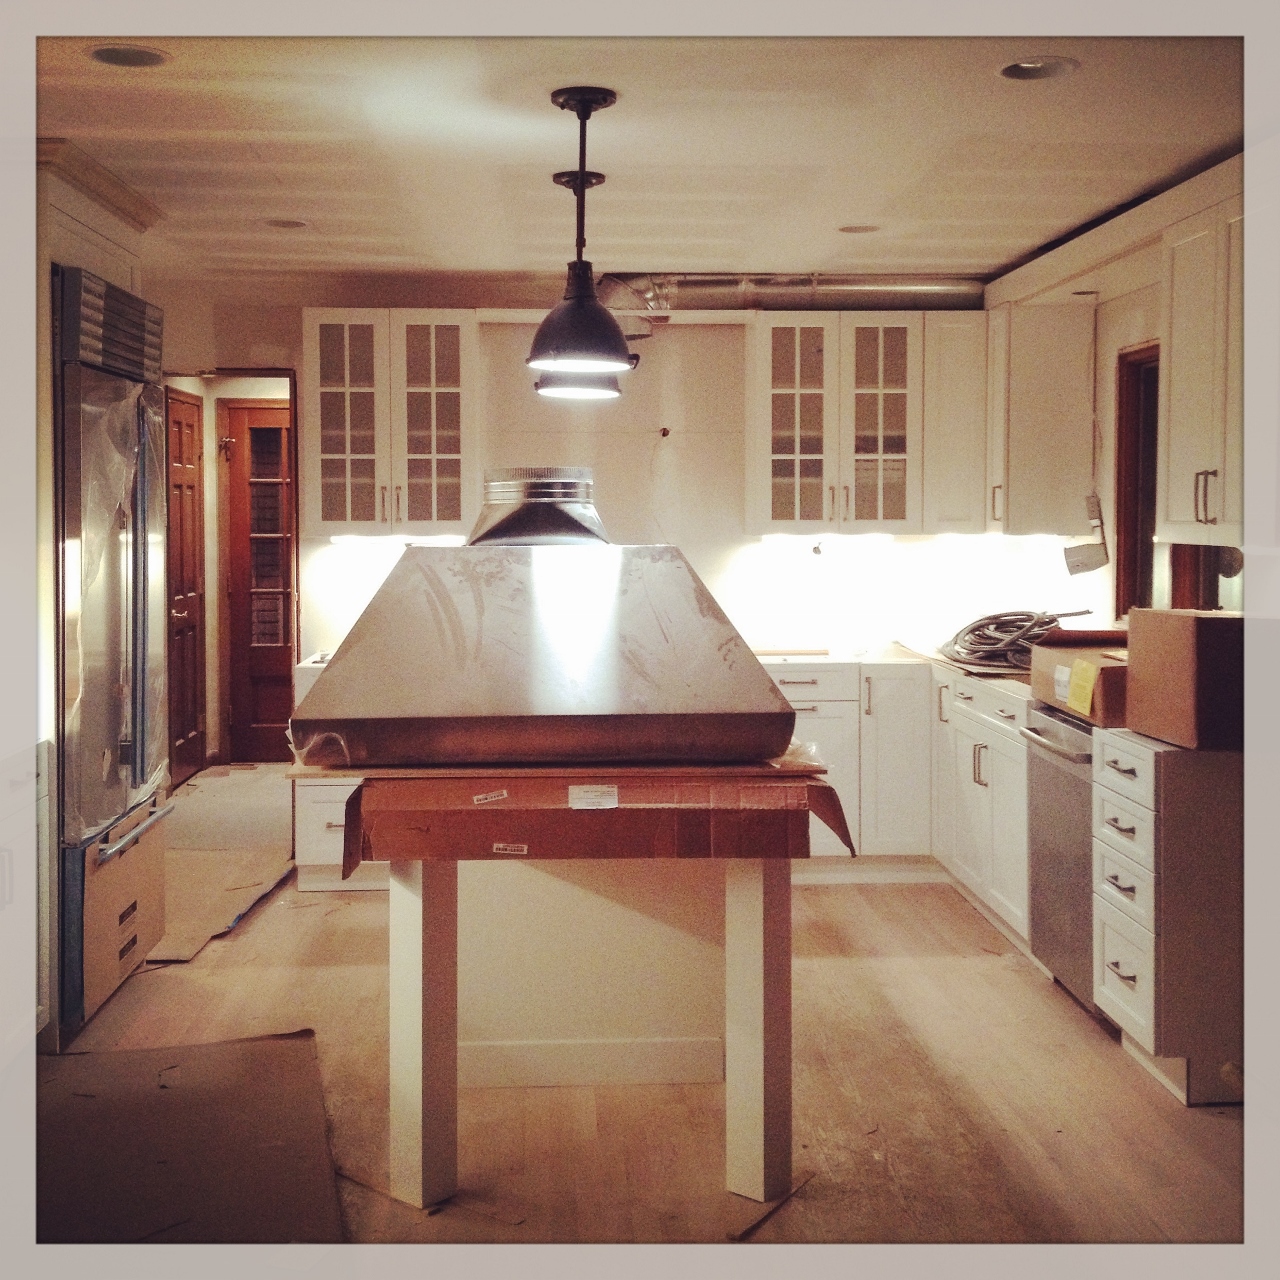
And the maple butcher block was installed on the island.

butcher (552x647)
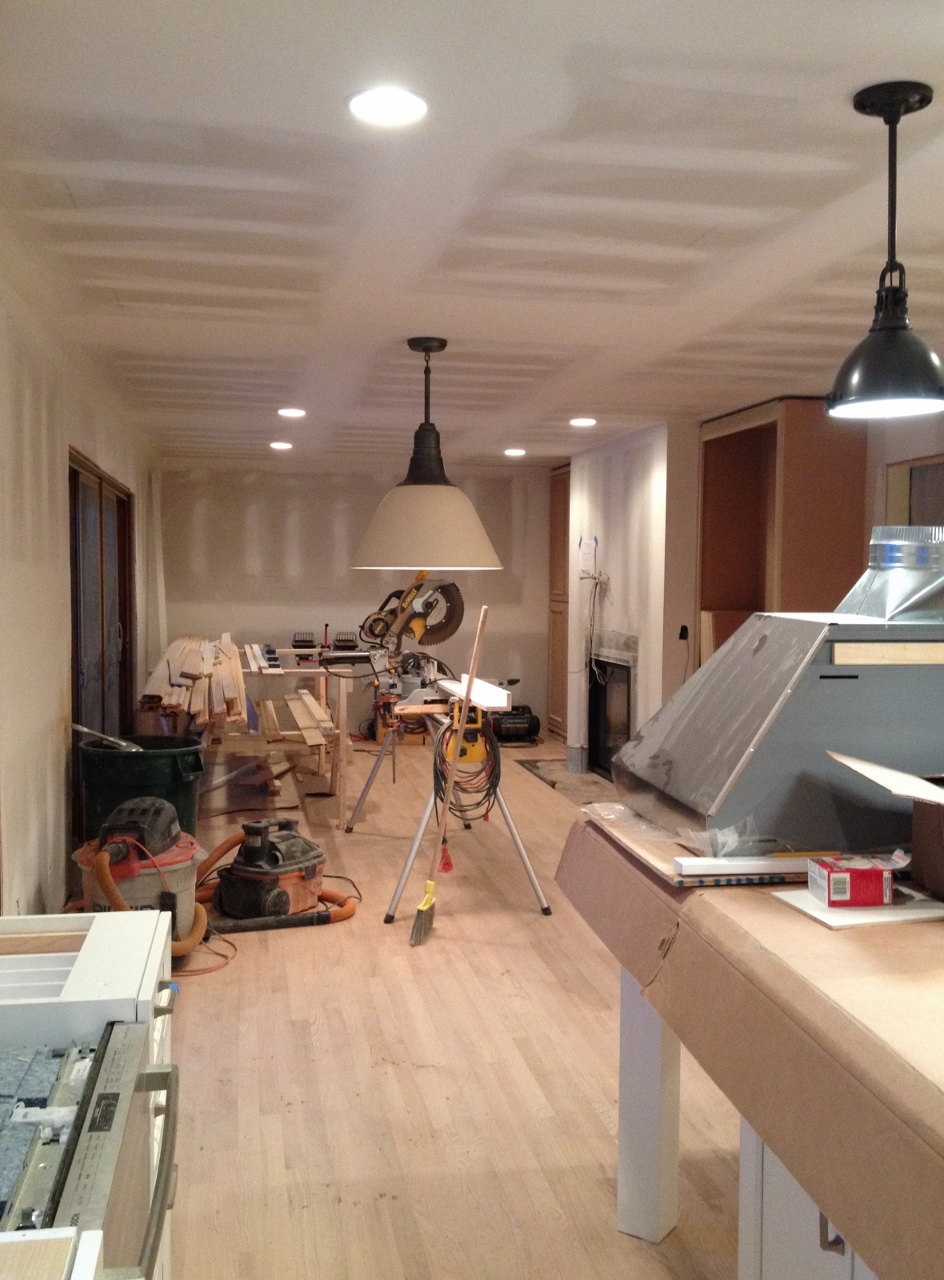
The lights over the island were put up. The electrician asked us if we wanted the longer rods or the shorter (he recommended the longer) and we chose shorter (and by we, I mean me, since the kitchen is you know, “mine.” I didn’t want anyone to bonk their head on the lights while cooking).

After they were installed, I felt like they were too short (#favoriteclient), so they went ahead and installed the longer rod for just one of them, so we could be certain of our decision by Monday (for sure the longer!).

IMG_9048 (960x1280)
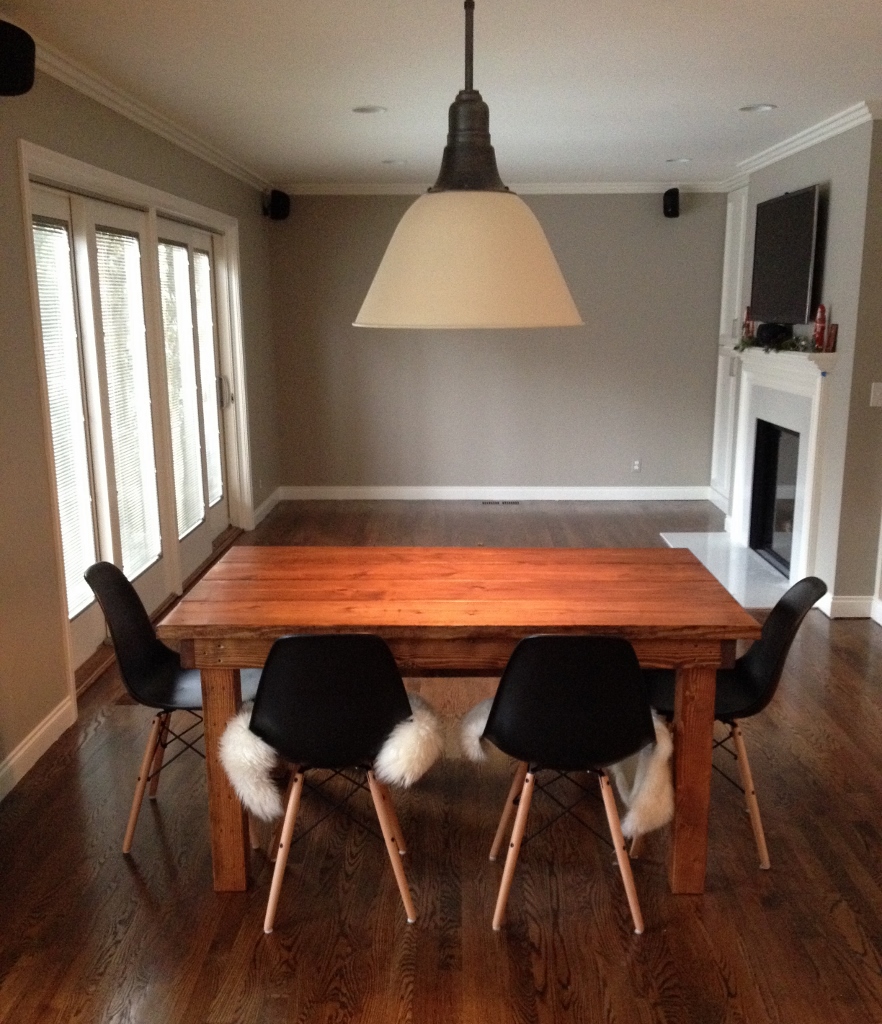
Our gigantor kitchen light was also installed…

IMG_9052 (944x1280)It’s definitely a biggie. But I got the size that was recommended to me by the good folks at Mutschler, so I’m trusting that once all the furniture is down (and our new kitchen table will sit centered for the most part under the light), it won’t look so in-your-face.

After the kids go to bed each night, my husband and I walk around the room and just take it all in (and of course find handles that are off center and fingerprint smudges on the white light fixture, etc). The decisions we’ve made are so far seem perfect. Fingers crossed that all the furniture we bought (most of which hasn’t arrived yet) will work with the space!

We Have Floors!

IMG_8934 (600x800)Our new floors got installed over the weekend (and completed Monday) – hurray!

To refresh your memory, here’s what the carpeting looked like before. The carpet, in its defense, was actually pretty nice and really good quality. Hate to rip something perfectly good out but we wanted hardwood to match the rest of the house (and because we just love hardwood).

house.family2The floor guy set up a make-shift workshop in the garage,

IMG_8913 (648x800)(and in the family room). And put down a layer of subflooring.

IMG_8920 (600x800)Then he installed 2 1/4″ wide red oak floors. The floors will get stained and sanded last, after everything else (cabinets, moldings, lights) is complete.

IMG_8921 (600x800)He also installed vents that are flush with the floor…

IMG_8935 (800x745)vs. the older vents we have throughout the rest of the house that are raised…

ventThe excitement was short lived; the floors got covered up again the day after they were installed.

IMG_8939 (600x800)But it’s nice to know they’re under the tape and paper. And even nicer knowing that the reason they’re there is because cabinets arrive today!

Kitchen Remodel – Week Three: Inspections, Insulation, Drywall

Week three of the kitchen remodel consisted of electrical and plumbing inspections, insulation, relocating the laundry chute and installing drywall.

IMG_8874 (600x800)IMG_8897 (588x800)IMG_8875 (593x800)The insulation was done by this guy (dang, I wish I could remember his name – Dale?), who also handled our demolition the first week. He’s a really nice guy and very fond of Sam the Labrador.

Sam, by the way, is so used to people coming in and out of the house, he barely gets up anymore to greet anyone. And he’s the only one who can sleep through the noise. His new hangout spot is none other than the floral couch (his old spot was the leather armchair in the family room, which is now in the basement and only accessible via the back of the house).

IMG_8912I covered the couch so he wouldn’t dirty it all up and am hoping that once the remodel is done, he’ll go back to his old spot (and if he doesn’t, he’ll be forced to. sorry, buddy). Yep, the zebra rug is still there (if you haven’t figured it out by now, remodel = expensive). But look – we got a coffee table! It belonged to my mother-in-law’s parents andĀ  it was hanging out in her garage, waiting for a home. It’s a little wobbly, but usable and we love it.

The electricians were here early in the week, finishing up with socket placement and all the other wires for the fridge, and lighting. The outdoor sconce placement was discussed, decided on and marked.

IMG_8876 (600x800)The inspections went well (to my knowledge), but they did insist that we install new smoke detectors throughout the house. We had battery operated ones, so the guys took those out on Wednesday and put in new ones upstairs and downstairs that are hardwired throughout the house. We also had to purchase a carbon monoxide plug-in.

IMG_8895 (600x800)The laundry chute was relocated. Old location is the lower rectangle, new location is the higher rectangle. It will still be accessible, but via a cupboard instead of on the backsplash, where it was before.

(Note: see the hollow area to the left of the laundry chute? That’s unused space under the stairs. Wish we could’ve figured out a way to use but…alas.)

IMG_8904 (600x800)

Standing in the family room looking at the kitchen.

IMG_8902 (600x800)

There will be built-in shelving on either side of the fireplace.

IMG_8901 (600x800)

Standing in the kitchen, looking at the family room. Fireplace on right.

Finally, some light! With the drywall up, the room is instantly brighter (and what the heck color to paint the walls?!? STILL trying to figure that one out. Any ideas?).

IMG_8906 (2) (600x800)Why use a ladder when you have stilts? Drywall was prepped today (I think they’re done? I’m not 100% sure).

Next week is going to be an exciting one….cabinets arrive! Also, I think they’re going to put in a zippered wall (vs. a cardboard and Visqueen wall that obviously we can’t walk through), which will be possibly even more exciting than the cabinets at this point because I am freezing from having to walk all the way around the house to get to the basement (laundry, filing cabinets, printer, random boxes – all of which I use often). It was 34 degrees this morning when we took the girls to school. Yikes.

Which reminds me of another thing I’m looking forward to when this project is done – getting to use our heated garage. My car has been parked outside during the remodel and it is cooooold in the mornings. So much to look forward to (and so thankful that these are my hardships at the moment).


Kitchen Demo – Day Three

IMG_8687 (600x800)At the end of Day Three, the flooring is gone. There were very nice oak floors in the kitchen, and had we only been redoing that room, we would have patched the flooring where needed. Since we are also redoing the family room (which did not have wood floors), we decided to go ahead and replace the whole kit and caboodle. Painful pocket-wise, but it was the right thing to do.

There was a question as to whether or not they were going to be able to take down the brick surrounding the fireplace (which was behind the marbled tile). Their (the kitchen people) thought was that they may have to go in with serious power tool action and even then, it may not come off, which would mean we would lose two inches of space.

It’s a long story. First of all, the room is narrow to begin with. Our new fireplace will be centered, and therefore needs to come forward in the room a bit, because of the fireplace in the adjacent room.

fireplace

The real estate photo of the fireplace.

SIDE NOTE: When we first saw the house, we hated the ledge in front of the fireplace. But we used it ALL the time. The girls could do art projects on it and it was a great place to sit. Everyone who came over somehow gravitated towards that ledge. It will be missed in a weird sort of way.

It was a relatively easy job in the end. By mid-day on Day Three, the red brick wall was down. Success.

IMG_8689 (600x800)There were two layers of subflooring in either the family room or kitchen (I don’t know which, but I overheard the guys talking). Here’s one layer, in the dumpster. What are those? Wood parquet? (My husband would know, but he’s down in the basement watching the game and I’d have to go outside in the cold through the garage and then down to the basement to ask him, which I’m totally not doing).

IMG_8683 (600x800)I feel a little better on Day Three with a somewhat workable set-up in the dining room. We’ve got a fridge, the espresso machine, toaster and microwave hooked up. We brought an old dresser down from upstairs to help with storage and counter space, and we have a variety of containers (milk crates, plastic bins, cardboard boxes) for snacks, other dry goods, utensils and the like.

IMG_8677IMG_8679Sure, it’s not ideal, but it could be worse. I miss my morning shakes (and they are SO good you guys), but still enjoy my cappuccino in the mornings, and have managed to make snacks and lunches for the girls without a complete meltdown. It’s super messy and time-consuming with our only water source on this floor down the hall (and a super small water basin to boot), but we’re doing it. Go team.