Kitchen Remodel – Week Three: Inspections, Insulation, Drywall

Week three of the kitchen remodel consisted of electrical and plumbing inspections, insulation, relocating the laundry chute and installing drywall.

IMG_8874 (600x800)IMG_8897 (588x800)IMG_8875 (593x800)
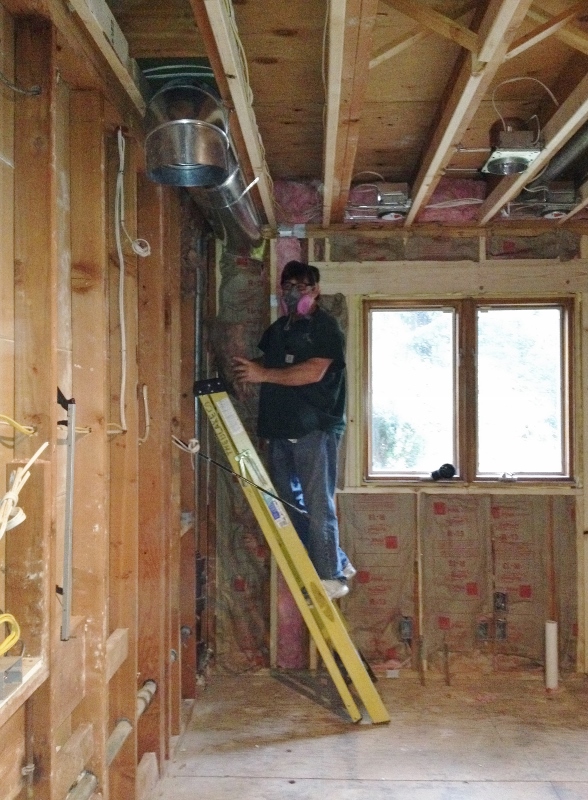
The insulation was done by this guy (dang, I wish I could remember his name – Dale?), who also handled our demolition the first week. He’s a really nice guy and very fond of Sam the Labrador.

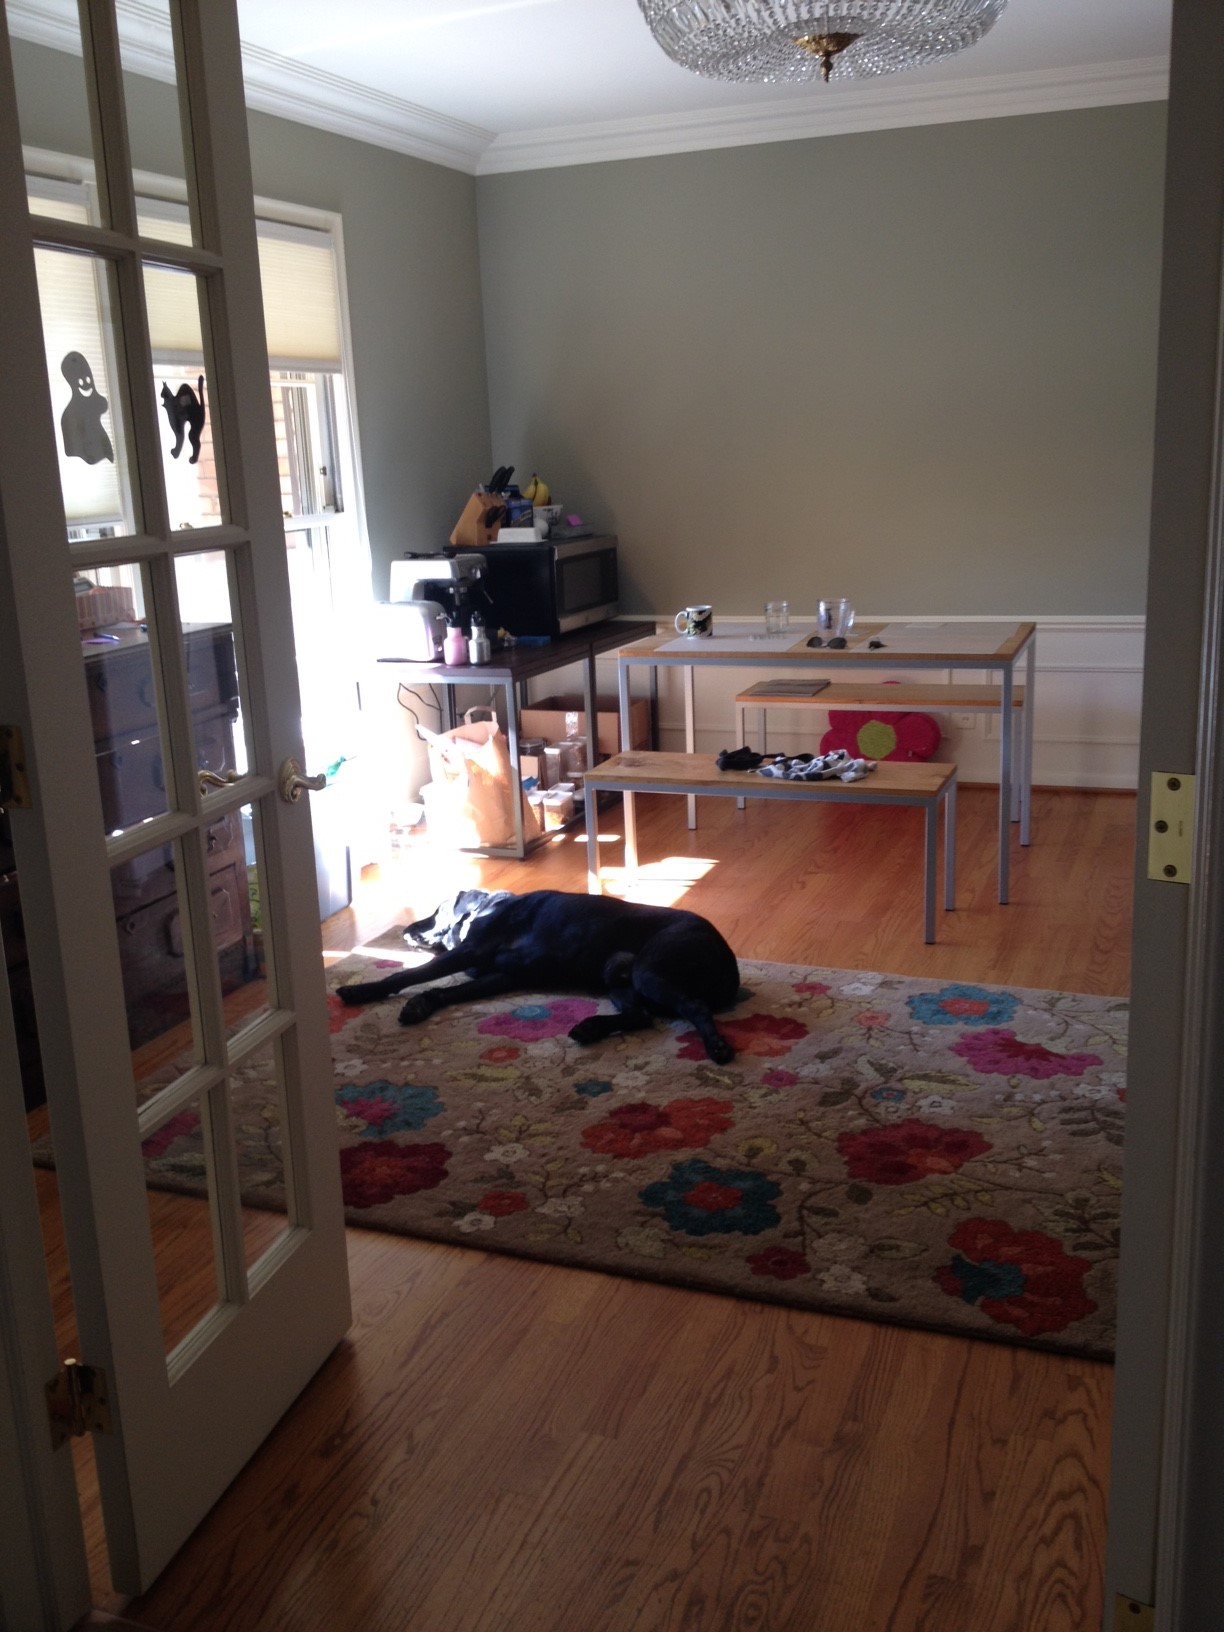
Sam, by the way, is so used to people coming in and out of the house, he barely gets up anymore to greet anyone. And he’s the only one who can sleep through the noise. His new hangout spot is none other than the floral couch (his old spot was the leather armchair in the family room, which is now in the basement and only accessible via the back of the house).

IMG_8912
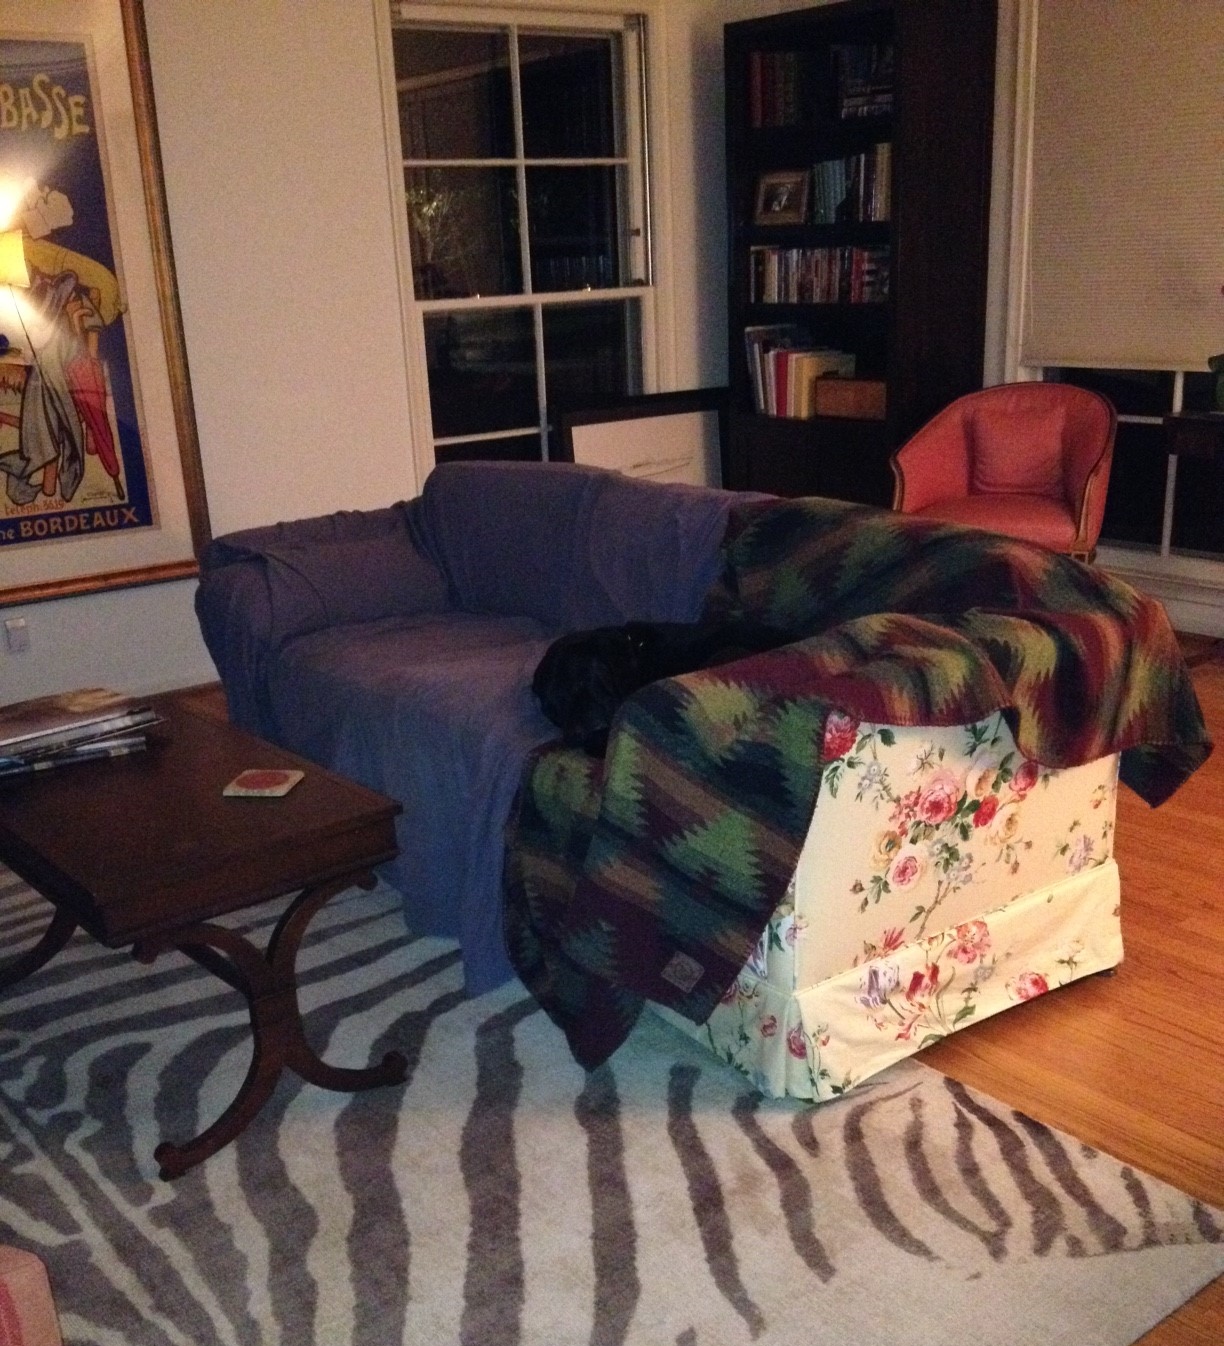
I covered the couch so he wouldn’t dirty it all up and am hoping that once the remodel is done, he’ll go back to his old spot (and if he doesn’t, he’ll be forced to. sorry, buddy). Yep, the zebra rug is still there (if you haven’t figured it out by now, remodel = expensive). But look – we got a coffee table! It belonged to my mother-in-law’s parents and  it was hanging out in her garage, waiting for a home. It’s a little wobbly, but usable and we love it.

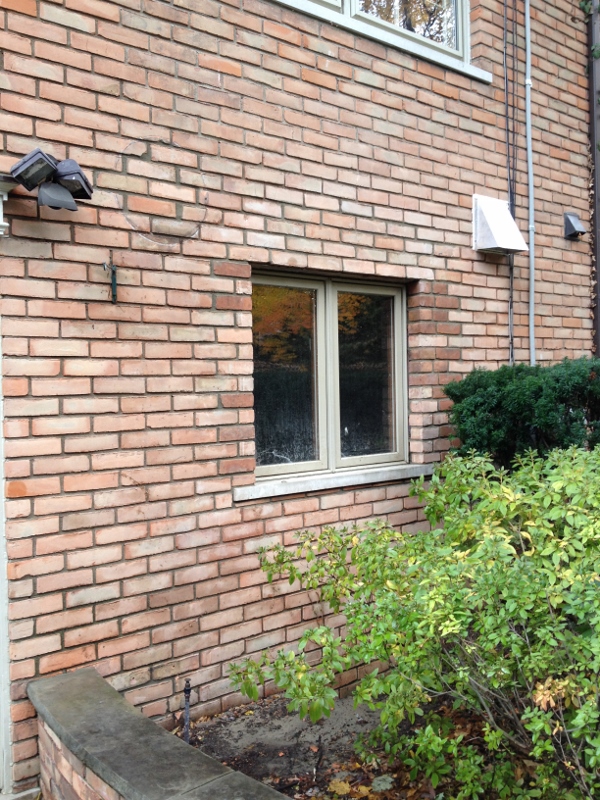
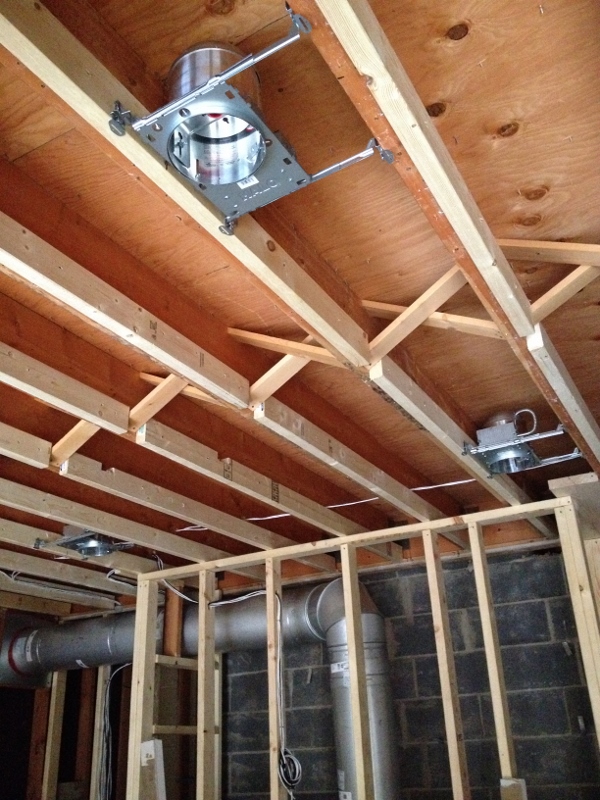
The electricians were here early in the week, finishing up with socket placement and all the other wires for the fridge, and lighting. The outdoor sconce placement was discussed, decided on and marked.

IMG_8876 (600x800)
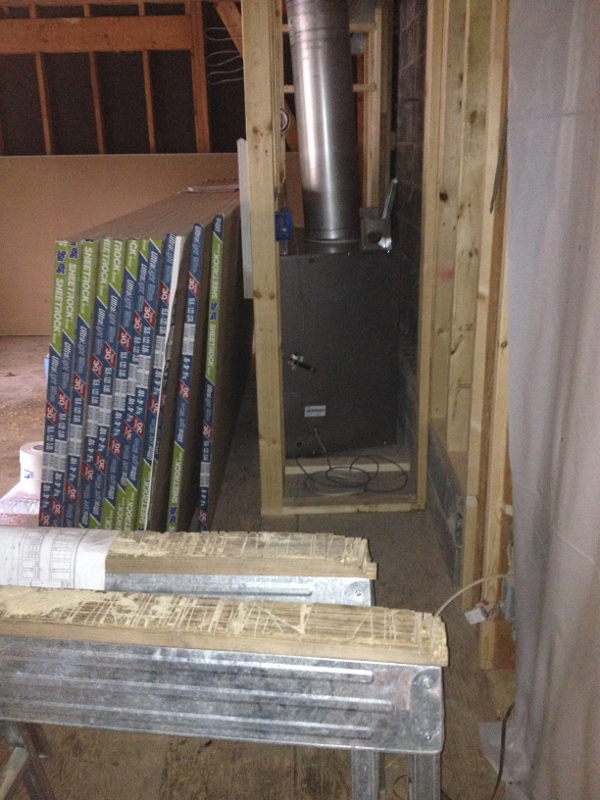
The inspections went well (to my knowledge), but they did insist that we install new smoke detectors throughout the house. We had battery operated ones, so the guys took those out on Wednesday and put in new ones upstairs and downstairs that are hardwired throughout the house. We also had to purchase a carbon monoxide plug-in.

IMG_8895 (600x800)
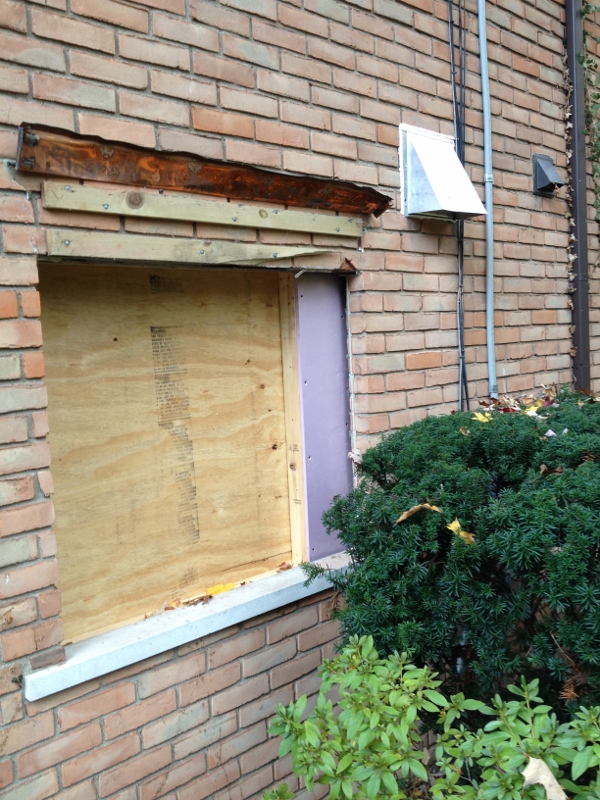
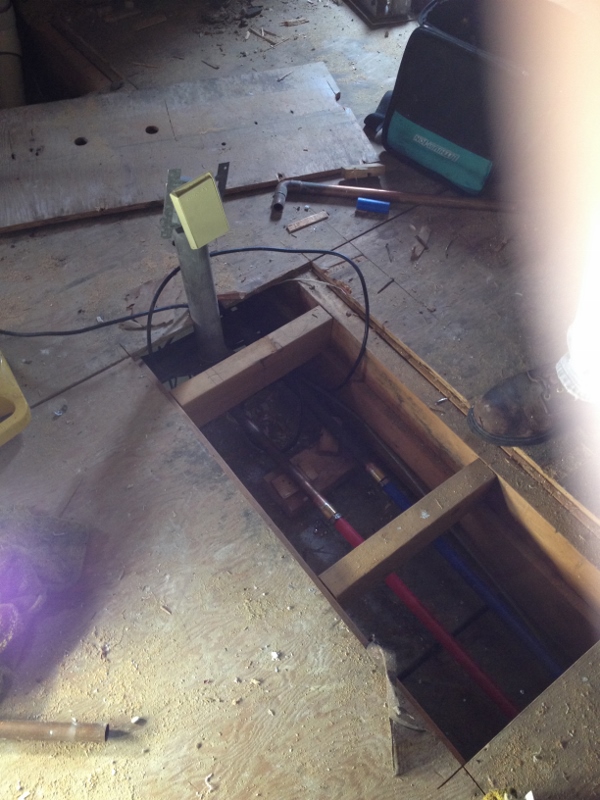
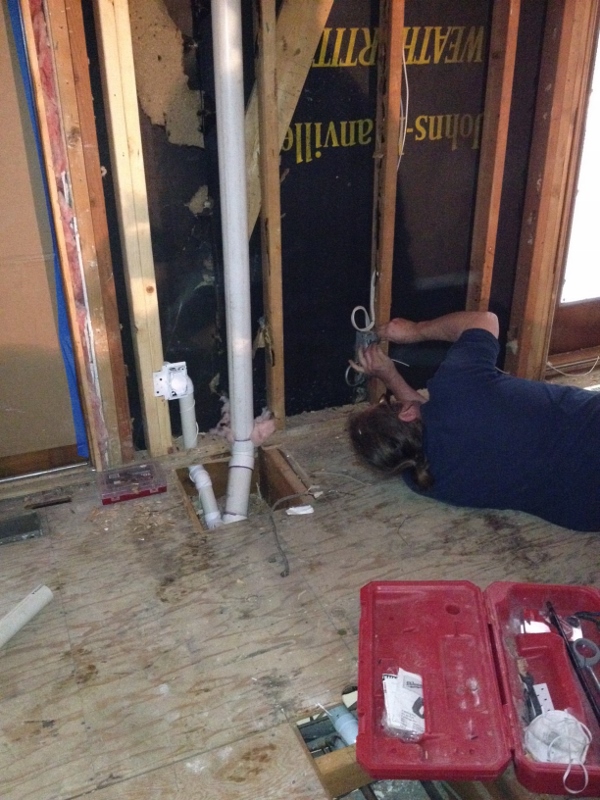
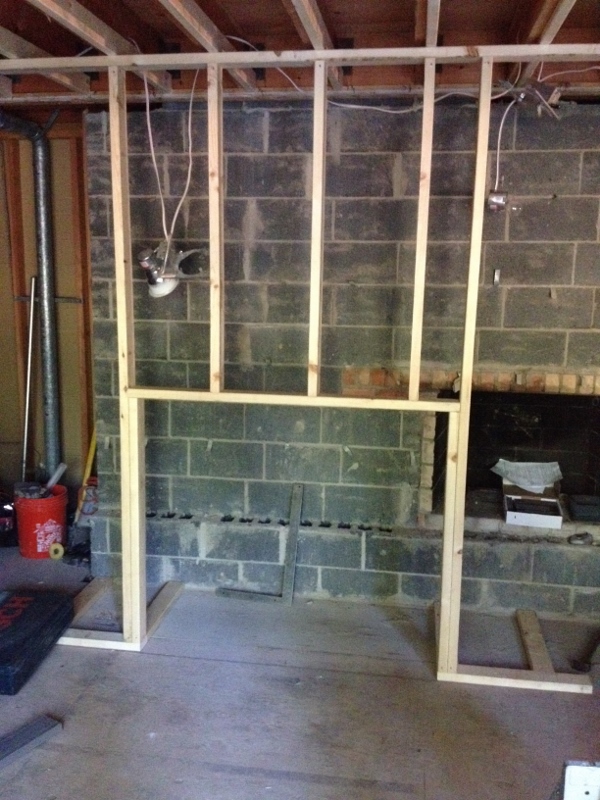
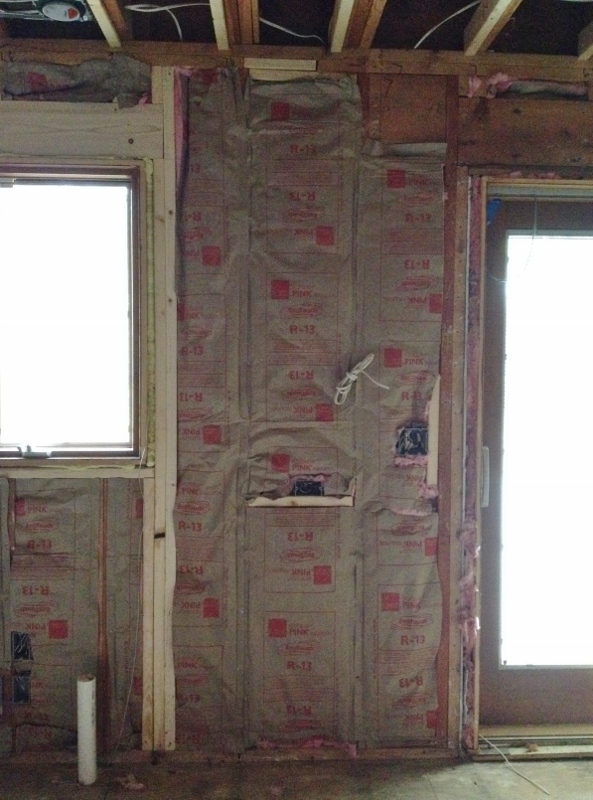
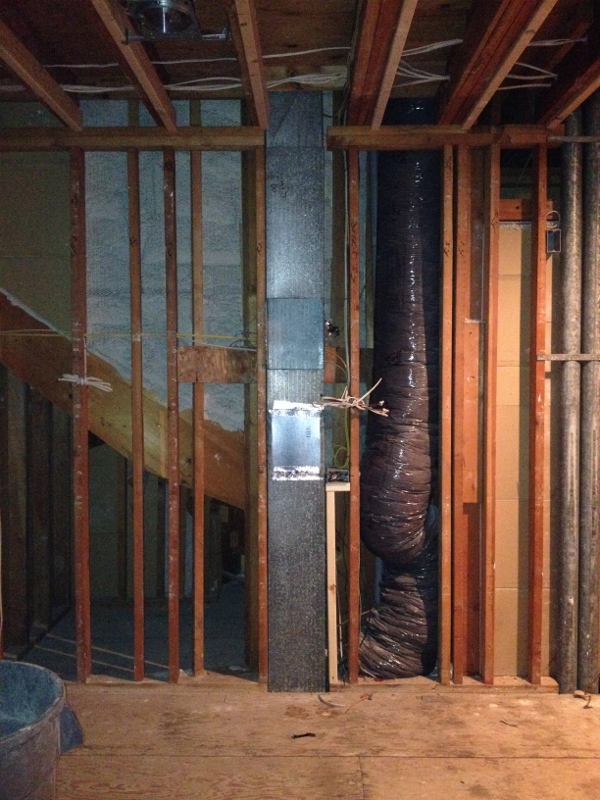
The laundry chute was relocated. Old location is the lower rectangle, new location is the higher rectangle. It will still be accessible, but via a cupboard instead of on the backsplash, where it was before.

(Note: see the hollow area to the left of the laundry chute? That’s unused space under the stairs. Wish we could’ve figured out a way to use but…alas.)

IMG_8904 (600x800)

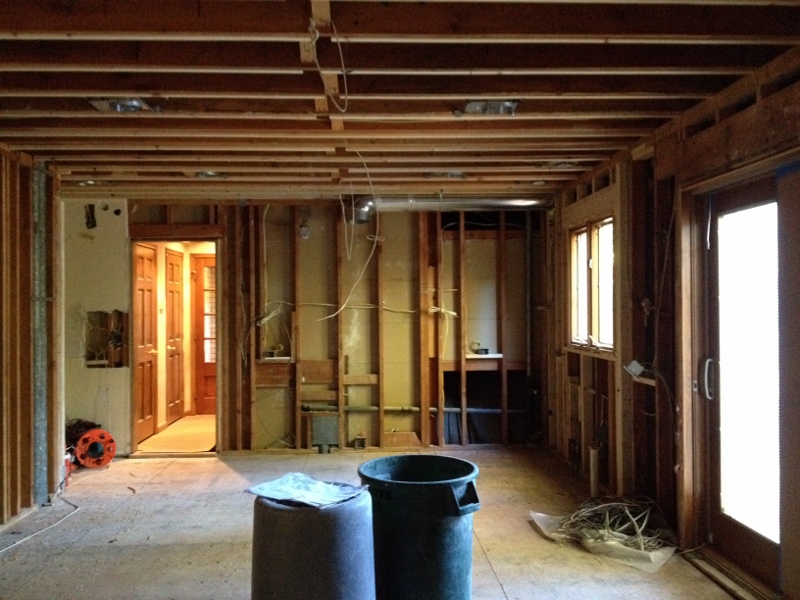
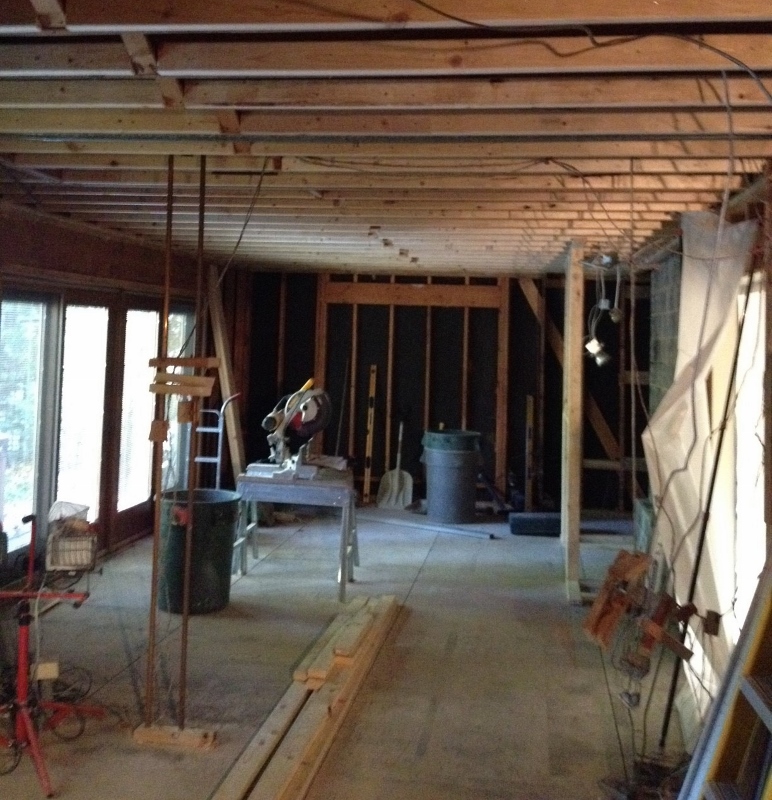
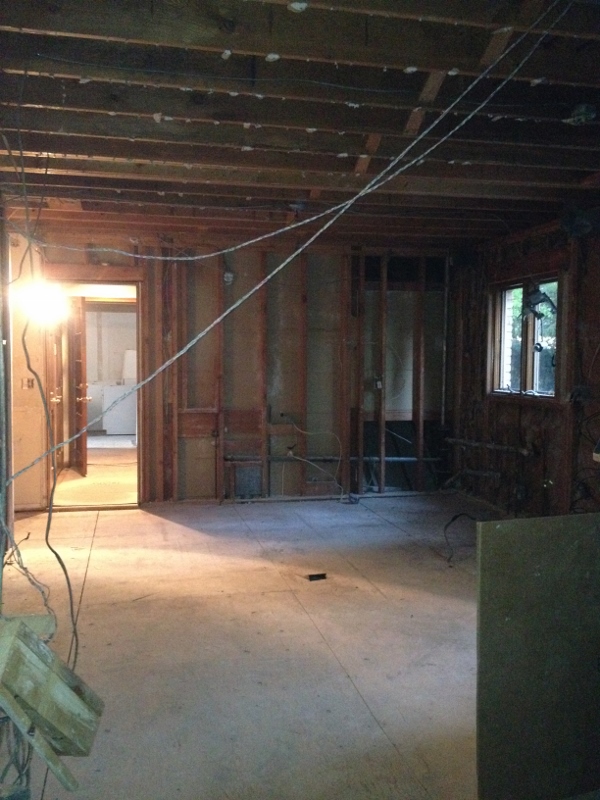
Standing in the family room looking at the kitchen.

IMG_8902 (600x800)

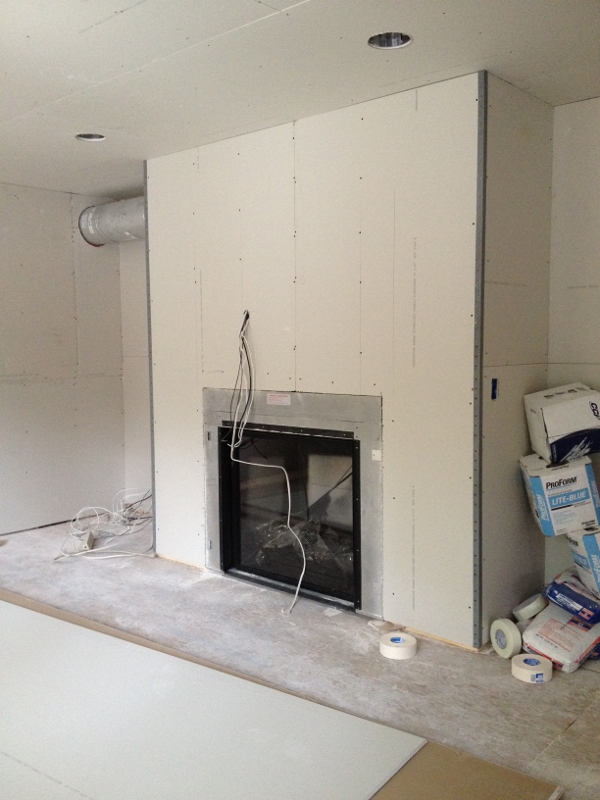
There will be built-in shelving on either side of the fireplace.

IMG_8901 (600x800)

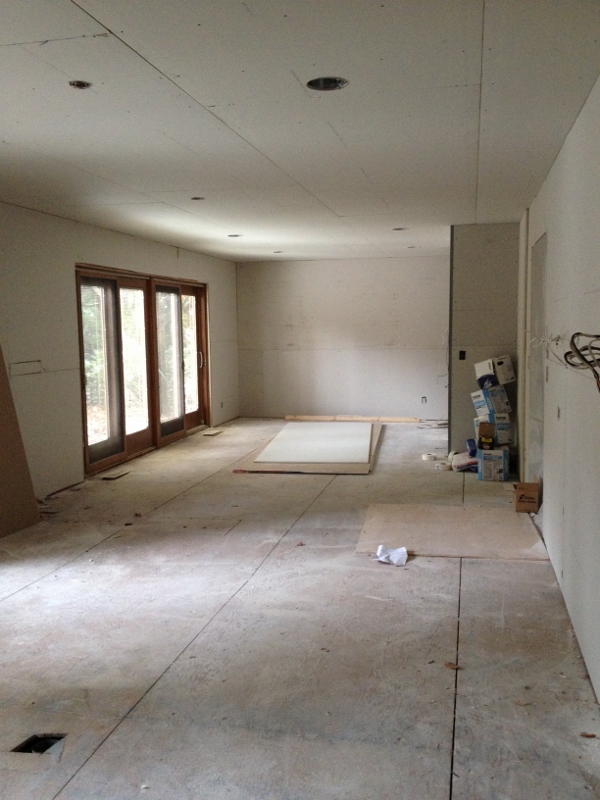
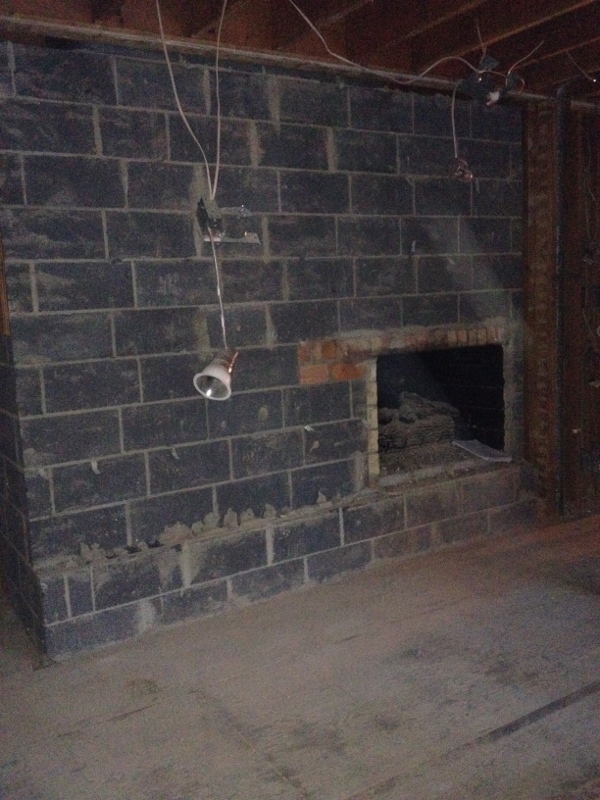
Standing in the kitchen, looking at the family room. Fireplace on right.

Finally, some light! With the drywall up, the room is instantly brighter (and what the heck color to paint the walls?!? STILL trying to figure that one out. Any ideas?).

IMG_8906 (2) (600x800)
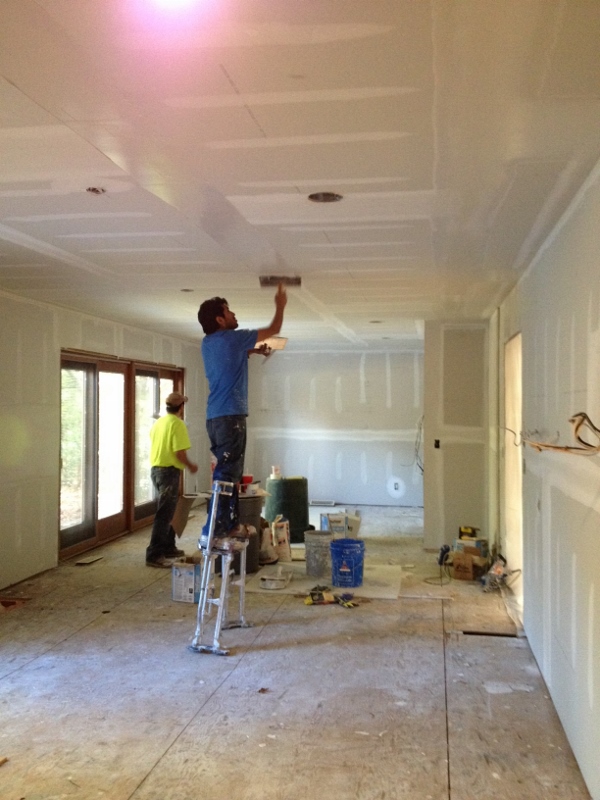
Why use a ladder when you have stilts? Drywall was prepped today (I think they’re done? I’m not 100% sure).

Next week is going to be an exciting one….cabinets arrive! Also, I think they’re going to put in a zippered wall (vs. a cardboard and Visqueen wall that obviously we can’t walk through), which will be possibly even more exciting than the cabinets at this point because I am freezing from having to walk all the way around the house to get to the basement (laundry, filing cabinets, printer, random boxes – all of which I use often). It was 34 degrees this morning when we took the girls to school. Yikes.

Which reminds me of another thing I’m looking forward to when this project is done – getting to use our heated garage. My car has been parked outside during the remodel and it is cooooold in the mornings. So much to look forward to (and so thankful that these are my hardships at the moment).


Sneak Peek – Kitchen Plans

RangeMockupIMG_8870 (800x600)Here’s a sneak peek at what the far kitchen wall will look like. Keeping my eyes on the prize.

Kitchen Remodel – Week Two: Brickwork, Fireplace, Electrical, Plumbing, Central Vacuum

The demolition crew finished up last Saturday (the 25th).  Week two consisted of electrical work, plumbing, building the fireplace wall and installing the fireplace, installing the vent in the kitchen (above the stovetop/range), relocating the central vacuum vent/pipe and moving the kitchen window.

IMG_8771 (600x800)

New vent (for range) installed and new window placement built out.

IMG_8792 (600x800)

Sawing bricks lengthwise to reuse for window.

IMG_8793 (600x800)IMG_8798 (600x800)The kitchen window was moved eight inches in order to be centered on the inside wall, and to allow for a corner cabinet. A few old vents were removed and a new one was installed. The masons were no-nonsense workers and they got the job done quickly. According to our project manager, the brick used for our house was no longer in production, so they had to mix some newer (longer by an inch, I believe) brick with some of the old brick they were able to reuse.

IMG_8754 (600x800)Sheetrock was delivered at the beginning of the week, but not yet installed.

IMG_8756 (600x800)

Fireplace vent.

IMG_8767 (600x800)And the fireplace and flue were installed. Couldn’t get a photo or peek at the fireplace because of the sheetrock.

IMG_8768 (600x800)Recessed can lights were installed in the family room and kitchen. Four in the family room and seven for the kitchen.

IMG_8762 (600x800)The waterlines in the wall we knocked down were relocated (blue and red) and the central vacuum vent (that gray pipe sticking up) was moved (below pic) to the far wall that adjoins the family room and kitchen.

IMG_8808 (600x800)

New vac vent outlet on kitchen wall (old location was sticking out of the floor near red toolbox).

Speaking of central vacuums, (and after having typed vacuum so many times, I think I may actually remember how to spell it from here on out), have I told you how much I love ours? It’s super powerful, doesn’t spew dust around (there’s a vent running to the backyard where any excess dust goes) and clean-up is easy (I’ve only emptied it twice since we moved in six weeks ago).

The only thing is that the hose is really long, which means it’s kind of a pain to take in and out of the closet (and takes up half the closet). The vacuum guy told me which attachments to use on which surfaces (I’ve been using the wrong one for the hardwood floors – oopsie. I’ll blame the scratches on the dog) and like any good vacuum salesman, talked up the newest central vac system.

IMG_8825 (2)

The Turbocat.

There’s “nothing wrong with” our current vacuum, but it’s over 15 years old. And of course their best unit is on sale right now. For just $1200, we can upgrade to a system that is lighter, more powerful and has a head that you don’t have to switch out for different surfaces (I want!). I asked how much it costs to install a central vac system, and I was surprised by the answer: on the low end, roughly $800-$1000 for a house our size. That doesn’t include the actual vacuum or accessories, but still. A lot less expensive than I thought.

I wondered which “regular” vacuum he considered the best, since people seem to love Miele or Dyson (or sometimes another brand).  He said a few things about both (and I get the impression he’s anti-bagless, which would put him in the Miele camp) and said something to the effect of, “I mean, how often do we talk to people about vacuums.” Ummm…obviously he’s unaware of the Facebook post on my page that went on for miles and miles.

We won’t be upgrading our system in the near future (hello, kitchen remodel!). We’re good with our “perfectly fine” (per vacuum guy) Turbocat, thank you.

Kitchen Remodel – Overheard

DayThreeI can hear everything the workers are saying through the walls and the Visqueen (plastic sheeting. My husband had me go to the hardware store to get some and the first four people I talked to had no idea what I was talking about. Granted, I only learned the term last week, but I don’t work at Ace Hardware. Should I be concerned?).

Moving on, here are some of the things I’ve heard overheard so far:

Grunting.

Groaning.

Spitting. The kind of spitting that starts very deep down, and takes some effort to get out. Where are they spitting?!?! I don’t want to know.

Swearing (although surprisingly not that much).

“Whoa! Whoaaaa! We almost had a waterfall in here!!”

“Wait, you can’t mess that wall up. The wall’s gotta stay.”

“Mom! I heard someone say ‘Ouch’ in the family room!”

“Oooooh-kay, how am I going to do this without putting a hole in the floor?”

ClangClangClang! Thud. “Aaaahh!” Pause. “Well, that’ll make it easier, huh?”

“You and your staff need to come up with a plan by the end of the day to deal with this.”

We did hire the best of the best (or so we’re told). So I try not to pay attention to noises in the other rooms, because I know everything will be taken care of one way or another, most of it without our knowing about it. (Fingers crossed).


Kitchen Demo – Day Five

DayFive2 (600x800)On Day Five, the fireplace was framed out. Another snafu. Behind the marbled tile and brick, they found cinder block. Fine. However, the cinder block contains the fireplace in the living room (on the other side of the wall). Taking out the bottom rows would mean screwing up the whole wall, which we didn’t want to mess with. This means we’re losing about five inches of width in our already narrow family room. Super bummer.

DayFive (772x800)They also started the process of relocating the kitchen window. By relocating I mean moving over to the right about eight inches. Quite a big deal to gain that small of a space, but what that will do is give me more room between the sink and stove/range, and also give me a nice corner cabinet, so it was worth it.

DayFive3 (600x800)

Kitchen window from the outside.

Meanwhile on Day Five….

I took a last-minute to San Francisco and Napa (thanks in part to my amazing husband, who shuffled his schedule around to be on kid duty). I spent Day Five (and Days Six and Seven), eating delicious food, going for walks along trails and beaches, looking at art, tasting wine and spending time with friends. It was great to get away from the noise and the chaos of the remodel.

IMG_8750 (800x800)

Cypress trees along the Land’s End trail and of course, the Golden Gate.

Bridge.LandsEndI ate a solo lunch at my favorite Asian restaurant, Out the Door. (THIS is how you do Asian, Grosse Pointe! Are you listening?). Cellophane noodles sauteed in sesame oil with garlic, scallions, Dungeness crab and cilantro. And a side of sriracha.

OutTheDoor.Oct14 (678x800) OutTheDoorMenuI love Robert Motherwell, and I got to see two of his paintings on this trip. I’d seen them both before, but it was fun to view them one right after the other. One was at Hess Collection winery in Napa and the other at the de Young Museum in Golden Gate Park.

Hess.MotherwellI was worried that being back in San Francisco was going to make me come completely undone. That maybe as I drove into the city, sadness and longing would overcome me and leave me feeling empty, lonely. But it never happened. I loved seeing the Bridge again and the ocean and the haunting foggy beauty that is Northern California and I will always miss that. But I think I’m where I’m supposed to be. On the descent into Detroit, I even caught myself thinking…”it’s good to be home.”

Kitchen Demo – Day Three

IMG_8687 (600x800)At the end of Day Three, the flooring is gone. There were very nice oak floors in the kitchen, and had we only been redoing that room, we would have patched the flooring where needed. Since we are also redoing the family room (which did not have wood floors), we decided to go ahead and replace the whole kit and caboodle. Painful pocket-wise, but it was the right thing to do.

There was a question as to whether or not they were going to be able to take down the brick surrounding the fireplace (which was behind the marbled tile). Their (the kitchen people) thought was that they may have to go in with serious power tool action and even then, it may not come off, which would mean we would lose two inches of space.

It’s a long story. First of all, the room is narrow to begin with. Our new fireplace will be centered, and therefore needs to come forward in the room a bit, because of the fireplace in the adjacent room.

fireplace

The real estate photo of the fireplace.

SIDE NOTE: When we first saw the house, we hated the ledge in front of the fireplace. But we used it ALL the time. The girls could do art projects on it and it was a great place to sit. Everyone who came over somehow gravitated towards that ledge. It will be missed in a weird sort of way.

It was a relatively easy job in the end. By mid-day on Day Three, the red brick wall was down. Success.

IMG_8689 (600x800)There were two layers of subflooring in either the family room or kitchen (I don’t know which, but I overheard the guys talking). Here’s one layer, in the dumpster. What are those? Wood parquet? (My husband would know, but he’s down in the basement watching the game and I’d have to go outside in the cold through the garage and then down to the basement to ask him, which I’m totally not doing).

IMG_8683 (600x800)I feel a little better on Day Three with a somewhat workable set-up in the dining room. We’ve got a fridge, the espresso machine, toaster and microwave hooked up. We brought an old dresser down from upstairs to help with storage and counter space, and we have a variety of containers (milk crates, plastic bins, cardboard boxes) for snacks, other dry goods, utensils and the like.

IMG_8677IMG_8679Sure, it’s not ideal, but it could be worse. I miss my morning shakes (and they are SO good you guys), but still enjoy my cappuccino in the mornings, and have managed to make snacks and lunches for the girls without a complete meltdown. It’s super messy and time-consuming with our only water source on this floor down the hall (and a super small water basin to boot), but we’re doing it. Go team.